Pages

Friday, October 20, 2017

Roasted Red Pepper and Tomato Soup

Ah, Fall. I have such mixed feelings about the change of seasons.  Let's see... I really don't like that the days are getting shorter and cooler.  And I am not happy about the rainy days we are having right now either, even if we really need the rain after the unusually hot and dry Summer we enjoyed!  On the other hand, I do love that some of my very favorite things to eat are more readily available and more reasonably price with the onset of the Fall harvest.

One of these favorite things is red peppers!  And when they are on sale at my local market, I buy a huge bagful and always roast some almost immediately. I love them sliced up on salads, and in omelets, on burgers, and especially in home made soups.  Today I am sharing a quick and easy way to put together a lovely one... Roasted Red Pepper and Tomato Soup.

It is just a matter of roasting the peppers and then pureeing them with a can of diced tomatoes.  If you are not sure how to do this, I have included a link to a little tutorial about it in the first recipe instrucion (which also has another delicious soup recipe).  It is so easy... just takes a bit of time.  You can season  your soup with basil and oregano, or leave plain and just add some salt and pepper. As is, it is vegan but if you don't care about that, you can  make it a little fancier and even company-worthy with the addition of a sprinkle of grated parmesan cheese.  It is truly delicious!

You might enjoy this soup as a first course at dinner, or as your main course at lunch. I have even slurped a bowlful as an afternoon snack.    Yes, the best part about Fall is definitely homemade soup!

Roasted Red Pepper and Tomato Soup by @WeCanBegin2Feed


Roasted Red Pepper and Tomato Soup
Makes 4 servings, approximately 1 cup each

Ingredients:

  • 3 red peppers
  • 1 28-ounce can (798 ml) diced tomatoes
  • salt and pepper to taste
  • dashed of basil and oregano (optional)
Instructions:
  1. Roast red peppers and allow to cool before removing seeds and skin.
  2. Place the peppers in a large bowl along with the tomatoes.
  3. Puree the veggies with immersion blender and pour into to saucean to heat.
  4. Warm soup to desired temperature over MEDIUM heat on stovetop.
  5. Remove to serving bowls and season.  Garnish as desired.
  6. Leftover soup may be stored in refrigerator for a couple of days or frozen.
1 serving, without garnish
WW SP = 0 (vegetables are 0 SP foods so nothing to count here)
Calories 70
Saturated Fat 0g
Carbohydrates 14.1g
Fibre 3.6g
Sugars 5.1g
Protein 2.6g


Red Peppers on baking sheet
I always make a few extra, for omelets, burgers, salads...  yum!


After seeding and removing the skin.


Season with salt and pepper, and a bit of dried basil and oregano if you like them.


A bit of shredded parmesan cheese adds a lot of flavor and only a few calories.

Are you a fan of roasted red peppers, too?  What is your favorite way to enjoy them?


Friday, June 30, 2017

Berryful Freezer Pops Coming Right Up!

These berryful freezer pops are a perfect treat for Canada Day or the 4th of July celebrations... especially if it is a hot sunny day in your neighborhood.  I first made them a few years ago when I won some new freezer pop molds in a giveaway from spabettie and wanted to try them out with something special and new.  I have used the molds a lot since then, but this recipe is still one of our favorites.  It is a great way to cool down on a hot Summer day.

They do take a few hours to set up so if you can, make them the day before you want to eat them.

These molds hold a total of 3 cups.  If you plan to make some pops for yourself, you will want to measure your molds and then adjust the amounts of the ingredients accordingly.  When I made them, I didn’t put enough water in the food processor, so I just added some more to the mixture once it was in the molds and then stirred it a bit.


Berryful Freezer Pops


Berryful Freezer Pops

Ingredients:
  • 2 cups frozen berry mixture (blueberries, blackberries, raspberries, strawberries)
  • 1-1/2 cups water
  • bit of Stevia (this is optional of course)
Instructions:
  1. Place water and berries into a heavy-duty blender and process until smooth and thick.
  2. Pour into freezer pop molds and freeze overnight.
Mine came out to about 23 calories each… and of course they are zero Smart Points for my Weight Watchers buddies. 

Of course you could use any fresh berries that you find in your local markets instead of frozen. I know there are still strawberries and raspberries and blueberries in my area.

How do you celebrate your national holiday?

Friday, May 19, 2017

Oat Scones... I Still Love Them

No matter what new food plan I set out to try, I always come back to an old favorite... tried and true... from Weight Watchers. It has gone through several evolutions, but for many years now, has been called the Simply Filling Technique.

In its simplest form, it involves eating from a comprehensive list of fruits, vegetables, lean proteins including meat and dairy, whole grains, and healthy oils.  It is based on whole, real foods.  Easy. Simple. Nutritious, and yes, filling.  Whole, real food fill you up and keep you satisfied. It is true.

I like the plan as I naturally gravitate to these kinds of foods and like to shop and prepare my meals at home, whether I am going to eat there or pack them along with me to have out.  I am a big fan of park bench and beachside picnics and snacks.

The plan does allow for occasion off-list indulgences, so I can still get in some nut butters and dried fruit, and the occasional glass of wine, too. No deprivation here.

Now, I admit, I don't eat a lot of grains. I prefer to get my carbs from fruits and veggies... I will occasionally eat some rice when I have sushi but for the most part, even quinoa only makes a rare appearance on my plate.... usually when I make a bowl-style lunch.  I cannot recall the last time I cooked oatmeal at breakfast.

But I was looking through some old posts and this recipe for Oat Scones piqued my interest. I had completely forgotten about it.  They really appealed to me, I decided to make them up and add them to my week's menu.  And I am happy to say they were as good as I remember.

I  have learned over the years that weighing dry foods on a scale, rather than measuring with cups is a more accurate way to calculate nutritional values. My original recipe, which you can find here, calls for 1-1/2 cups of oats. The package shows that 40g is equal to 1/2 cup so I weighed out 120g of oats instead of measuring 1-1/2 cups.  When I compare them, the 120g is less for sure.   I also weighed the oat bran.  I used 95g instead of measuring out 1 cup.

Do I need to even mention I use gluten free oats?

And I chose a rectangular cake pan because I currently do not own a pie plate. The cake pan is about 8 inches X 11 inches.  I cooked the scones for 40 minutes and made sure to let them rest for 15 minutes before I cut them into 8 pieces and tested them.  That waiting was hard!

I have been enjoying them all week... my favorite way is to make up a bit of PB2 and slather that all over the top.

Oat Scones by @WeCanBegin2Feed

Nope, PB2 is not part of the Simply Filling Technique... you have to count 1 Smart Point for it.  And nope, I do not usually use a fork to eat it either!

I have since learned that if I cut the scone in half horizontally, it lasts twice as long... and half a scone is actually sometimes all I want!  Imagine.


So, if you follow the Simply Filling Technique, these Oat Scones are a no-count food.  If you top them with something not on the list, just count those Smart Points.  And if you are a Weight Watcher who counts Smart Points, here is the pertinent nutritional information for you.

Per serving of 1 scone or 1/8th recipe
Weight Watchers SP = 4.
Calories 122
Saturated Fat .5g
Sugar 3g
Protein 6g

Is oatmeal part of your food plan?  What is your favorite way to enjoy it?


Wednesday, April 12, 2017

Coloring Easter Eggs with Natural Dyes

It is that time of year again... getting ready to color Easter eggs for The Captain. They are hard boiled and have cooled nicely so getting ready to dye them all kinds of lovely colors.


If your are a newbie at coloring eggs, you can read about how to get started with hardboiling them and using food coloring for dying them here...  and you can read about coloring the insides of the eggs here.

As for me, I am doing something a bit different again this year.

Instead of using the little dye tablets that you can pick up in coloring kits, or even food coloring, I am going to use some natural dyes... and I am going to be dying our eggs with foodstuffs that I have on hand in my kitchen.

I recently received some fun and intriguing information about just how to do go about doing this and want to share it with you so that you can join in and dye your own eggs with natural dyes, too.

For example, did you know that using frozen blueberries color dye your eggs a lovely blue-purple? Or that using paprika will color your eggs a sunny golden-orange?

Have a look at this pretty infograpic, and if you are interested, click on it to see the full how-to article.


Natural Egg Dyes


Do you color eggs for Easter?

Have you tried any of these natural egg dyes yourself?


Sunday, April 09, 2017

Simple Vanilla PB Mug Cake

I have been really enjoying my Simple Chocolate Mug Cake quite often lately. I love that I can quickly make up a cake in order to enjoy a bit of sweetness with only a few carbs or fat and lots and lots of protein.

I have also been sharing my precious cakes with The Captain, but when I offered to make him one last night for a snack, he sorta turned up his nose. He said he didn't want that much.  I was quite taken aback.

Okay then, if a whole cake was too much, I suggested we share one and then he told me that he really didn't feel like chocolate... and that the cake is a bit too dry for his liking.   Hmmmm.

Well, I have vanilla whey powder as well as chocolate, so I offered to make him a slightly smaller cake... vanilla with peanut butter, with a moister texture,  and he quickly agreed.

I used vanilla whey, with PB2, almonds milk, and a bit of baking powder.  And, in order to make the outcome a bit moister, I used less than a whole scoop of the vanilla whey protein powder.  That made the batter wetter, and the cooked cake definitely moister.  Clever, right?

Of course you could use any peanut flour you like, and even unflavored whey... just add a bit of vanilla extract when you mix.

I do think it is a nice change from the chocolate... and it really is a better batter!  The PB2 gives it just a hint of peanut butter flavor... very subtle... so it is still good with any kind of fruit or toppings you might like.

Here is the recipe.  Hope you like it.

Simple Vanilla PB Mug Cake by @WeCanBegin2Feed


Simple Vanilla PB Mug Cake
makes 1 serving

Ingredients:
  • 2/3 scoop (about 21g) vanilla whey protein powder
  • 2 Tbs PB2
  • 1/4 cup nut milk
  • 1/2 tsp baking powder
Instructions:
  1. Coat the inside of a microwave safe cooking dish with non-stick spray.
  2. Place the dry ingredients in a small mixing bowl and stir to combine.
  3. Add the nut milk and stir.  You want a brownie batter consistency so if it is a bit thick, add more nut milk a couple of drops at a time.
  4. Spoon batter into prepared baking dish.
  5. Cook in microwave oven for 1 minute on HIGH. Time may vary slightly.
  6. Remove cooked cake from microwave and allow to cool about 30 seconds before removing cake to serving dish.
  7. Top as desired or eat plain.
Per serving, without toppings.
Weight Watchers Smart Points = 2.
Calories 132;
Fat 3g;
Saturated Fat 1g;
Carbohydrates 7g;
Sugar 2g;
Protein 22g


What about you? Chocolate or Vanilla PB?

Tuesday, April 04, 2017

Homemade Roasted Almond Butter

For the past couple of weeks I have been spending way too much time with my dentist... Oh, don't misunderstand me.  I really like my dentist. He seems to be a very nice man.  But I had a loose filling one one of  my upper left molars which, when removed, revealed a cavity, and also a crack in one of my upper right molars...  all of which led to needing 2 crowns.  The prep work was killer and now I feel like a princess with the price I had to pay for these lovely crowns!

But the real downside here is that I can no longer eat whole almonds.  I love, love, love almonds... raw almonds mostly, but I also enjoy them roasted, plain or salted, and even hickory smoked... you present them to me, and I will eat them.  Happily.  But no longer... apparently that is likely what cracked my tooth and I was informed by the dental assistant that none of us with large fillings should really eat hard nuts of any kind or size.  Come to think of it I had a cracked tooth a few years back and it was likely from the same thing. Drat.

So, what to do with this huge stash of raw almonds I now have in my pantry thanks to a great sale at Costco last month?  Why, make almond butter, of course!  And it was actually easier than I thought it would be.  Way easier!

I decided to make small batches of almond butter and store it in a glass container in the refrigerator. So I started with 2 cups of nuts, and roasted them in the oven and put them into my food processor while still very warm from the oven... turned it on and waited to see what would happen.  At first I thought my food processor was not adequate. I could see that the nuts were ground into almond meal, but then all of a sudden it happened... creamy, almond butter!  I had to taste it right away of course.

And it is delicious. And it is thick and creamy. I am hooked!

Now I know you can add flavors if you like... cocoa, cinnamon, maple syrup, coconut... you name it.  And I just may try that. But to store it, I am leaving it plain, and then can add other goodies to it once I get over the novelty of having it at all.  I actually quit buying almond butter a couple of years ago when the price went past the point of what I call affordable. 

So here it is... plain old almond butter.  And I love it!  Hope you will too.

Homemade Roasted Almond Butter by @WeCanBegin2Feed


Homemade Roasted Almond Butter
makes about 1-1/2 cups

Ingredients:

  • 2 cups raw almonds

Instructions:
  1. Preheat your oven to 350 F.
  2. Line a baking sheet with parchment paper.
  3. Place the almonds on the baking sheet and spread them out so they are in a single layer.
  4. Roast the almonds in the oven for 10 minutes.
  5. While the almonds are roasting, set up your food processor with the S shaped cutting blade.
  6. Remove the almonds from the oven and put them into the food processor immediately. You want them to be hot when they are being processed.
  7. Puree on HIGH for a couple of minutes at a time, stopping to scrape and push the ground nuts down into the center.
  8. It will take about 10 minutes for the almonds to become a creamy butter texture.
  9. Remove to storage jar and store in fridge for up to a couple of weeks.
Per 1 Tbs serving.
Weight Watchers Smart Points =3.
Calories 95;
Fat 8g;
Saturated Fat .75g;
Carbohydrate 3g;
Sugar 1g;
Protein 3.5g

These values are meant to be used as a guideline.

Printable Recipe


Homemade Roasted Almond Butter by @WeCanBegin2Feed
Puree the roasted, still hot almonds in the food processor till a creamy butter appears!

How about you?  Are you an almond butter fan?

Have you made your own nut butters?


Thursday, March 30, 2017

Simple Chocolate Mug Cake

I admit to having what I like to call a latent sweet tooth.  It sorta lays in wait and does not show itself very often... thankfully... but when it does appear, it demands to be placated and satisfied almost immediately.  I have come up with a Simple Chocolate Mug Cake, using ingredients that I always have in my panty. It tastes somewhat sweet and satisfies that need.  But it is also actually very low in sugar and carbs and fat, overall, and jam-packed with protein... and flavor!  It is gluten-free, and grain-free, too.

I can pretty much whip it up in a couple of minutes and if you have a sweet tooth that needs attention, you know how important immediacy can be!  You have just got to get something sweet into your mouth as quickly as possible so it might just as well be something that is not going to break your macro/calorie/Smart Points bank, right?

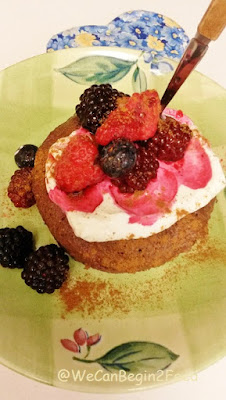
The 3 main ingredients in my Simple Chocolate Mug Cake are chocolate based... chocolate whey protein powder, unsweetened cocoa powder, and chocolate PB2... and then I add almond or other unsweetened nut milk and a bit of baking powder.  I mix them together and pop into the mike for a minute. The aroma is wonderful. Gives me something to savor and anticipate while I am waiting a few seconds for it to cool enough to slide out of the baking dish and into a serving bowl.

And it also gives me a bit of time to decide if I want or need toppings... yogurt, nut butter of some kind, berries, cinnamon... you know... the really good stuff.  Sometimes I just want plain chocolate cake and eat it right out of the baking dish!  It is that good.  I am thinking you could also make up an icing with protein powder or even top it with whipped coconut cream.  Mmmm.  Yep. Gotta try that!

Now, I have used a plant-based protein powder instead of whey to make this cake. And it works, but you need to cook it a bit longer for some reason.  Your choice.

I have also used a variety of nut milks, depending on what I have on hand.  I am sharing the nutritional information using unsweetened original Almond Breeze.  And if you don't have chocolate PB2, use the plain one, or failing that, use a second tablespoon of the cocoa powder. You will get an even chocolatier cake!  Is that even a word?

Okay, I did not make it in a mug... but you could!  My baking dish is a small glass bowl... about 4 inches across and about 3 inches deep.

Simple Chocolate Mug Cake


Simple Chocolate Mug Cake
makes 1 cake

Ingredients:
  • 1 scoop (about 32g) chocolate whey protein powder
  • 1 Tbs unsweetened cocoa powder
  • 1 Tbs chocolate PB2
  • 1/4 cup nut milk
  • 1/2 tsp baking powder
Instructions:
  1. Coat the inside of a microwave safe cooking dish with non-stick spray.
  2. Place the dry ingredients in a small mixing bowl and stir to combine.
  3. Add the nut milk and stir.  You want a brownie batter consistency so if it is a bit thick, add more nut milk a couple of drops at a time.
  4. Spoon batter into prepared baking dish.
  5. Cook in microwave oven for 1 minute on HIGH. Time may vary slightly.
  6. Remove cooked cake from microwave and allow to cool about 30 seconds before removing cake to serving dish.
  7. Top as desired or eat plain.
Per serving, without toppings.
Weight Watchers Smart Points = 3.
Calories 166
Fat 4g
Saturated Fat 1g
Carbohydrates 8g
Sugar 3g
Protein 28g

Printable Recipe

Simple Chocolate Mug Cake
Dry ingredients before mixing together.  See the difference in color of my 3 chocolatey ingredients and then the baking powder?

Simple Chocolate Mug Cake
Thick brownie-like batter after stirring in nut milk.  Not runny at all but very moist.

Simple Chocolate Mug Cake
Cooked cake, cooling a bit before placing in serving dish.

Simple Chocolate Mug Cake
With yogurt and berries.

Simple Chocolate Mug Cake
With yogurt and a drizzle of sugar free chocolate mint syrup.

Simple Chocolate Mug Cake
Whether you dress it up or enjoy it plain, you are sure to love this easy peasy chocolate cake!


Do you have a sweet tooth?  How do you satisfy it quickly?

Saturday, March 25, 2017

Delicious and Filling Protein Powered Pancakes

Over the past many, many years I have experimented with breakfast foods and breakfast recipes. I have learned that my first meal of the day needs to be filled with protein.  Oh, I have tried various carb-filled delights such as pancakes with fruit and maple syrup, or stuffed French toast with whipped cream... and as delicious and filling as I find those things while I am eating them, an hour later I am shaking and HANGRY... with low blood sugar and a headache.  And quite miserable.  And I make everyone around me miserable too, until I get something else to eat.

So, I know that my breakfast needs protein.  Lots of protein.  On days I work out in the morning, I normally have a shake made with some kind of protein powder.  If I use a whey powder, I make it with nut milk and some kind of fruit.  If I use a vegan powder that is higher in carbs I usually add only water.

After my workout, I will have an another small protein-filled meal... usually eggs or egg whites with spinach, or squash, and perhaps some turkey bacon.

But on days I don't work out, I like to have one solid meal in the morning and then not eat again till noon.  I have been trying out different foods to make sure I have my nutritional bases covered... protein, carbs, and a bit of fat... enough to get me through a busy morning but not weigh me down. It needs to have lots of protein, some carbs, some fat.  A good balance of all three.

I love pancakes.  But I have not found a mix that is both high protein and gluten-free that is anywhere near affordable, so I have been trying various mixtures of ingredients, and I think I have finally come up with something that is worthy of sharing.

I have make this same recipe 3 different mornings now and find it not only tastes great, but it also fills me up and keeps me fuelled, easily, through several hours.  Now, admittedly, it is kind of time consuming to make a new batch every time I want some, so I have started to pre-measure the dry ingredients for a few batches and keep them in sealed bags in the pantry. That way I can grab one, add the wet ingredients, and start cooking within a couple of minutes. Cleanup is easy too.

I weigh gluten-free oats and then grind them into flour in my food processor.  Then I mix them with the rest of the dry ingredients and bag them up.  When I want to make a batch of cakes, I mash some banana, then beat up some egg whites, add the dry ingredients and cook the cakes in a pre-heated pan that has been coated with a bit of non-stick spray.

If you don't have a banana, I am pretty sure that an equal amount of pumpkin puree or unsweetened applesauce would work as well.  Of course, the N.I. would be slightly different.

I use a vanilla whey protein powder. You could try another flavor if you like. If you use unflavored, then add a bit of vanilla extract or almond extract to your wet ingredients.

Here are the amounts you need to make 4 nice pancakes.  And yes, they freeze.  Make a huge batch and freeze them. That would make mornings even easier, right?

Protein Powered  Pancakes


Protein Powered Pancakes
makes 1 serving of 4 cakes

 Dry Ingredients:
  • 40g oats ground into flour (about 1/3 to 1/2 cup)
  • 16g whey protein powder (about 1/2 scoop)
  • 1/2 tsp baking powder
  • liberal dash of cinnamon
Wet Ingredients:
  • 1/2 cup egg whites
  • 60 g ripe banana, mashed (about 1/2 small)
Instructions:
  1. Pour egg whites into mixing bowl and beat till a bit fluffy with fork or whisk.
  2. Add mashed banana and beat a bit more.
  3. Add the dry ingredients, mix well.
  4. Make 4 individual pancakes.  Use a 1/4 cup measure to spoon batter into prepared pan.  Cook for a couple of minutes and flip over to cook second side. Remove to plate and cover to keep warm. Repeat for all 4 cakes.
  5. Serve with favorite toppings.
Per 4 cake serving, without toppings.
Weight Watchers Smart Points =  8.
Calories 324;
Fat 4g;
Saturated Fat 1g;
Carbohydrates 42g;
Sugar 9g;
Protein 33g

Protein Powered Pancakes
Cook the pancakes one at a time in a preheated pan.

Protein Powered Pancakes
I like sugar free syrup on my pancakes... but you could try fruit or yogurt.

Protein Powered Pancakes
Dig in!


Are you pancake fan or do you prefer waffles?


Sunday, January 22, 2017

Slow Cooker Chicken Coconut Curry

I have just put all of the ingredients for this dish into my slow cooker and set it to cook. I love this meal. It is my third time making it so I thought it was about time I shared it with you.  Slow Cooker Chicken Coconut Curry is a recipe I found in a local food market newsletter, but I have altered it somewhat to simplify the ingredient list and the instrucions, so I will share it the way I make it my own kitchen.

I admit it does take a bit of time preparing the ingredients.  But once that is done you just layer it all in the slow cooker and let it simmer. So simple.  Just before I serve it I cook some vegetables to add to the dish.... peas, carrots, green beans, snow peas... whatever you select will work just fine.

And, I like to add a spoonful of plain Greek yogurt to my curry dishes too, just before serving.  It makes a soupy stew really creamy.  Mmmmm.

I do love the aroma of a nice light curry coming from my slow cooker... tantalizing, especially on a gloomy and cool Winter day!

I used chicken breasts here but thighs would be fine too. And if you don't have chicken stock, grab a boullion cube and make some!  I also like a light coconut milk, but if you only have full fat, go ahead and use it... just make the adjustment if you need the nutritional information or Smart Points values for tracking.


Slow Cooker Chicken Coconut Curry
makes 6 servings

Ingredients:
  • 16 ounces of boneless skinless chicken cut into cubes
  • 3 medium white potatoes, scrubbed and cuts into cubes
  • 1 medim onion, peeled and sliced vertically
  • 1 large can (28 oz.) diced tomatoes
  • 1 cup chicken stock
  • 1 can (400 ml.) light coconut milk
  • 2 Tbs curry powder
Instructions:
  1. Coat the inside of your slow cooker with non-stick spray for ease of cleanup.
  2. Prepare ingredients as described.
  3. Stir curry powder into chicken broth.
  4. Layer ingredients in the slow cooker... potatoes, onions, chicken, tomatoes, chicken broth with curry powder.
  5. Put lid on slow cooker.
  6. Turn setting to HIGH for 15 minutes, then turn down to LOW and let cook for 7 to 8 hours.
  7. Turn setting to off. Prepare addition veggies as desired and divide among serving plates.
  8. Portion leftovers and freeze or store in fridge for one or two days at most.
Per serving, without additional veggies.
Weight Watchers Smart Points  = 6.

Calories 201
Fat 4g
Saturated Fat 3g
Carbohydrates 23g
Sugar 5g
Fibre 4g
Protein 16g

Slow Cooker Chicken Coconut Curry
Getting ready to serve.  Mmmm.  Smells great!

Slow Cooker Chicken Coconut Curry
With some petite green peas added.

Slow Cooker Chicken Coconut Curry
And a bit of yogurt for me.

Slow Cooker Chicken Coconut Curry
Stirred in...


Are you a fan of slow cookers?  All year round, or just in the Winter?