Showing posts with label Paleo. Show all posts

Friday, October 20, 2017

Roasted Red Pepper and Tomato Soup

Ah, Fall. I have such mixed feelings about the change of seasons.  Let's see... I really don't like that the days are getting shorter and cooler.  And I am not happy about the rainy days we are having right now either, even if we really need the rain after the unusually hot and dry Summer we enjoyed!  On the other hand, I do love that some of my very favorite things to eat are more readily available and more reasonably price with the onset of the Fall harvest.

One of these favorite things is red peppers!  And when they are on sale at my local market, I buy a huge bagful and always roast some almost immediately. I love them sliced up on salads, and in omelets, on burgers, and especially in home made soups.  Today I am sharing a quick and easy way to put together a lovely one... Roasted Red Pepper and Tomato Soup.

It is just a matter of roasting the peppers and then pureeing them with a can of diced tomatoes.  If you are not sure how to do this, I have included a link to a little tutorial about it in the first recipe instrucion (which also has another delicious soup recipe).  It is so easy... just takes a bit of time.  You can season  your soup with basil and oregano, or leave plain and just add some salt and pepper. As is, it is vegan but if you don't care about that, you can  make it a little fancier and even company-worthy with the addition of a sprinkle of grated parmesan cheese.  It is truly delicious!

You might enjoy this soup as a first course at dinner, or as your main course at lunch. I have even slurped a bowlful as an afternoon snack.    Yes, the best part about Fall is definitely homemade soup!

Roasted Red Pepper and Tomato Soup by @WeCanBegin2Feed


Roasted Red Pepper and Tomato Soup
Makes 4 servings, approximately 1 cup each

Ingredients:

  • 3 red peppers
  • 1 28-ounce can (798 ml) diced tomatoes
  • salt and pepper to taste
  • dashed of basil and oregano (optional)
Instructions:
  1. Roast red peppers and allow to cool before removing seeds and skin.
  2. Place the peppers in a large bowl along with the tomatoes.
  3. Puree the veggies with immersion blender and pour into to saucean to heat.
  4. Warm soup to desired temperature over MEDIUM heat on stovetop.
  5. Remove to serving bowls and season.  Garnish as desired.
  6. Leftover soup may be stored in refrigerator for a couple of days or frozen.
1 serving, without garnish
WW SP = 0 (vegetables are 0 SP foods so nothing to count here)
Calories 70
Saturated Fat 0g
Carbohydrates 14.1g
Fibre 3.6g
Sugars 5.1g
Protein 2.6g


Red Peppers on baking sheet
I always make a few extra, for omelets, burgers, salads...  yum!


After seeding and removing the skin.


Season with salt and pepper, and a bit of dried basil and oregano if you like them.


A bit of shredded parmesan cheese adds a lot of flavor and only a few calories.

Are you a fan of roasted red peppers, too?  What is your favorite way to enjoy them?


Friday, June 30, 2017

Berryful Freezer Pops Coming Right Up!

These berryful freezer pops are a perfect treat for Canada Day or the 4th of July celebrations... especially if it is a hot sunny day in your neighborhood.  I first made them a few years ago when I won some new freezer pop molds in a giveaway from spabettie and wanted to try them out with something special and new.  I have used the molds a lot since then, but this recipe is still one of our favorites.  It is a great way to cool down on a hot Summer day.

They do take a few hours to set up so if you can, make them the day before you want to eat them.

These molds hold a total of 3 cups.  If you plan to make some pops for yourself, you will want to measure your molds and then adjust the amounts of the ingredients accordingly.  When I made them, I didn’t put enough water in the food processor, so I just added some more to the mixture once it was in the molds and then stirred it a bit.


Berryful Freezer Pops


Berryful Freezer Pops

Ingredients:
  • 2 cups frozen berry mixture (blueberries, blackberries, raspberries, strawberries)
  • 1-1/2 cups water
  • bit of Stevia (this is optional of course)
Instructions:
  1. Place water and berries into a heavy-duty blender and process until smooth and thick.
  2. Pour into freezer pop molds and freeze overnight.
Mine came out to about 23 calories each… and of course they are zero Smart Points for my Weight Watchers buddies. 

Of course you could use any fresh berries that you find in your local markets instead of frozen. I know there are still strawberries and raspberries and blueberries in my area.

How do you celebrate your national holiday?

Tuesday, April 04, 2017

Homemade Roasted Almond Butter

For the past couple of weeks I have been spending way too much time with my dentist... Oh, don't misunderstand me.  I really like my dentist. He seems to be a very nice man.  But I had a loose filling one one of  my upper left molars which, when removed, revealed a cavity, and also a crack in one of my upper right molars...  all of which led to needing 2 crowns.  The prep work was killer and now I feel like a princess with the price I had to pay for these lovely crowns!

But the real downside here is that I can no longer eat whole almonds.  I love, love, love almonds... raw almonds mostly, but I also enjoy them roasted, plain or salted, and even hickory smoked... you present them to me, and I will eat them.  Happily.  But no longer... apparently that is likely what cracked my tooth and I was informed by the dental assistant that none of us with large fillings should really eat hard nuts of any kind or size.  Come to think of it I had a cracked tooth a few years back and it was likely from the same thing. Drat.

So, what to do with this huge stash of raw almonds I now have in my pantry thanks to a great sale at Costco last month?  Why, make almond butter, of course!  And it was actually easier than I thought it would be.  Way easier!

I decided to make small batches of almond butter and store it in a glass container in the refrigerator. So I started with 2 cups of nuts, and roasted them in the oven and put them into my food processor while still very warm from the oven... turned it on and waited to see what would happen.  At first I thought my food processor was not adequate. I could see that the nuts were ground into almond meal, but then all of a sudden it happened... creamy, almond butter!  I had to taste it right away of course.

And it is delicious. And it is thick and creamy. I am hooked!

Now I know you can add flavors if you like... cocoa, cinnamon, maple syrup, coconut... you name it.  And I just may try that. But to store it, I am leaving it plain, and then can add other goodies to it once I get over the novelty of having it at all.  I actually quit buying almond butter a couple of years ago when the price went past the point of what I call affordable. 

So here it is... plain old almond butter.  And I love it!  Hope you will too.

Homemade Roasted Almond Butter by @WeCanBegin2Feed


Homemade Roasted Almond Butter
makes about 1-1/2 cups

Ingredients:

  • 2 cups raw almonds

Instructions:
  1. Preheat your oven to 350 F.
  2. Line a baking sheet with parchment paper.
  3. Place the almonds on the baking sheet and spread them out so they are in a single layer.
  4. Roast the almonds in the oven for 10 minutes.
  5. While the almonds are roasting, set up your food processor with the S shaped cutting blade.
  6. Remove the almonds from the oven and put them into the food processor immediately. You want them to be hot when they are being processed.
  7. Puree on HIGH for a couple of minutes at a time, stopping to scrape and push the ground nuts down into the center.
  8. It will take about 10 minutes for the almonds to become a creamy butter texture.
  9. Remove to storage jar and store in fridge for up to a couple of weeks.
Per 1 Tbs serving.
Weight Watchers Smart Points =3.
Calories 95;
Fat 8g;
Saturated Fat .75g;
Carbohydrate 3g;
Sugar 1g;
Protein 3.5g

These values are meant to be used as a guideline.

Printable Recipe


Homemade Roasted Almond Butter by @WeCanBegin2Feed
Puree the roasted, still hot almonds in the food processor till a creamy butter appears!

How about you?  Are you an almond butter fan?

Have you made your own nut butters?


Monday, May 09, 2016

Red Cabbage with Avocado and Sunflower Seeds

I have been reading a lot about adding nutrient dense plant based foods to  my diet in order to decrease the amount of snacking I do after dinner in the evenings.   For some reason, it has become an issue, and I am not happy about it.

So, the gist of it all is to eat more veggies so you won't have cravings for more, and your belly will be so full that you won't want to snack anyway.  I have been working on it for the past few weeks and it led me to joining a Facebook group where everyone has the same goal.  And it has spurred me to doing some experimenting in the kitchen again.

I got this idea from one of the women in the group... and at first it sounded quite odd... but very intriguing. I have made the dish twice now.  The first time it was our whole dinner.  And it was very filling and quite tasty.  The second time, I made about half and we had it as a side dish with some BBQ'd pork.  I think that The Captain preferred having it this way. I liked it better as dinner.  You can decide for yourself.

But I do hope you will give it a try.  I have never really been a fan of cooked cabbage... cabbage rolls, for example, have never really been a favorite of mine... but this red cabbage is sauteed only until soft, not cooked all the way to limp, so that may be the difference.  And of course the lime and avocado are just a natural pair.

Here is how it goes... These are the amounts I used for our main dish meal.  Adjust for your own table.


Red Cabbage with Avocado and Sunflower Seeds
Makes 2 servings.

Ingredients:
  • 6 cups shredded red cabbage
  • 2 tsp coconut oil
  • 1/2 tsp salt
  • 2 cloves garlic, peeled, smashed and minced
  • 2 Tbs raw sunflower seeds
  • 1 medium avocado, about 4 ounces, peeled, seeded and cut into large slices
  • juice from one lime
  • Salt and Pepper to season

Instructions:
  1. Set a large saute pan over MEDIUM heat and place the coconut oil in it to melt.
  2. Add the cabbage, salt and garlic, and cook for about 15 minutes, stirring every few minutes
  3. Remove to 2 large bowls or plates and sprinkle each with half of the sunflower seeds.
  4. Place half the avocado slices on each plate.
  5. Drizzle each with half the lime juice.
  6. Serve with salt and pepper on the side.
Per serving.
Weight Watchers Smart Points = 4 (because the cabbage and lime juice is not counted)


Calories 240
Fat 17g
Saturated Fat 5g
Carbohydrates 20g
Sugar 7g
Fibre 9g
Protein 5g

Saute the salted cabbage with garlic in the coconut oil till softened but not limp.


Plate and serve warm.


Do you enjoy meatless meals occasionally?

If you enjoy this recipe I hope you will PIN it.  Thanks for sharing.

Sunday, April 03, 2016

Avocado and Egg Salad

I picked up a bag of 5 very large, and almost ripe, avocados at Costco one day last week.  They are absolutely delicious... is there anything more delightful than a perfectly ripe avocado?  I have been trying to think of new ways to eat them up... and came up with this Avocado and Egg Salad for dinner.

I want to try a few new things that I hope The Captain will enjoy as well.  He is not always very keen on the creamy texture of plain avocado.

In the Spring and Summer when we are spending more and more time outdoors, I keep some things on hand in the refrigerator to put together quick meals.  Hardboiled eggs is one of my favorite go-to items... so while I washed and cut up some greens, The Captain peeled some eggs, and our dinner came together rather quickly.

And it was wonderful!  I am sharing the ingredients I used for 2 fairly large dinner salads.  I think the next time I make this, I will try adding some crumbled bacon and some capers for garnish and a flavor boost.


Avocado and Egg Salad

Avocado and Egg Salad
Makes 2 servings

Ingredients:
  • 2 to 3 cups salad greens, washed and dried
  • 10 grape tomatoes cut in half
  • 3 or 4 thin slices of red onion
  • 1/2 cup fresh parsley, chopped
  • 1 mini cucumber, cut into slices
  • 2 hard boiled eggs, peeled and slices
  • 1 large avocado, washed, peeled and cut into chunks
  • Salt and pepper
For the dressing:
  • 2 tsp olive oil
  • 1/1/2 Tbs apple cider vinegar
  • splash of lemon juice
Directions:
  1. Place the salad greens in 2 serving bowls and set aside
  2. Put the tomatoes, red onions, parsley, cucumber, eggs, and avocado in a medium mixing bowl.
  3. Mix the dressing ingredients together in a small bowl and pour over the eggs, etc in the mixing bowl.
  4. Toss gently.
  5. Spoon the mixture over salad greens and serve with salt a pepper to season.
Per serving.
Weight Watchers SP = 8.  *
Calories 273
Saturated Fat 5g
Sugar 2g
Protein 9g

* Using the Weight Watchers Recipe Builder (which will not add points for the onion, cucumber, tomatoes, and parsely, it comes to 8 SP. If you calculate using the N.I. it will come to 9 SP)


Not only pretty but delicious and filling too!


The Captain had some rye bread toast with his!


If you are interested in learning more about the health benefits of avocados and other interesting facts about them, please check out this article called 13 Health Benefits of Avocado.


Tell me you love avocados too!  What is your favorite way to serve them?

If you like this idea, I hope you will PIN it!


Thursday, February 25, 2016

Roasted Cauliflower and Chicken Soup

I have been buying up cauliflower like a crazy person lately. All Winter long they were so expensive... I saw them as high as $6.95 per head... and now that they are a decent price again, I cannot stop buying them!

But I can only eat so much Low-Carb Flatbread and Cauliflower Rice, so have been trying to come up with some new ways to enjoy all of this glorious cauliflower.  This soup was an experiment for sure, and a happy one as it turned out so well.   We almost always have some roasted chicken breasts in the refrigerator as I tend to do them in batches of 3 or 4 every few days so I have some on hand for salads or for The Captain's favorite fried rice dish at lunch time.

I used a bit of fat free yogurt in this dish to give it a creaminess, but you could leave it out if you are eating Paleo.  This soup is naturally gluten free.

Roasted Cauliflower and Chicken Soup

Roasted  Cauliflower and Chicken Soup
Makes 2 servings.

Ingredients:
  • 4 cups cauliflower, washed and broken into florets
  • 1/2 cup onion roughly chopped
  • 2 tsp olive oil
  • 2 cups chicken broth
  • 1 tsp minced garlic
  • 1 cooked chicken breast, about 6 to 8 ounces, cut into small chunks
  • 1/2 cup fat free plain Greek yogurt
  • Salt and Pepper to taste
Instructions:
  1. Preheat your oven to 375°F.
  2. Line a baking sheet with foil and lightly coat with a non-stick spray.
  3. Spread the cauliflower florets and onion pieces on the foil and drizzle or spray with the olive oil.
  4. Place in oven and roast for 30 minutes. 
  5. Remove from oven and place the veggies in a stockpot or large sauce pan.
  6. Add the chicken broth and garlic to the veggies and bring to a boil.
  7. Simmer for about 5 minutes.
  8. Add the chicken and heat through about 5 more minutes.
  9. Remove from heat and then puree with an immersion blender till the chicken is shredded.
  10. Divide the mixture between 2 bowls and then stir 1/2 cup of yogurt into each.
  11. Season with salt and pepper.
You can garnish your soup in a variety of ways... I had a few pieces of shaved parmesan cheese on mine and it was delicious. I think crumbled bacon and chopped green onions and a bit of shredded cheddar would be really nice too.

Per serving without garnish.
WW Smart Points = 5.
Calories 243; Saturated Fat 1g; Sugar 10g; Protein 36g.

Roasted Cauliflower and Onions
Roasted cauliflower and onions


Leftover cooked chicken breast, cut into chunks


Into the stockpot with broth


Garnished and ready to serve


Are you a cauliflower fan, too?

What's your favorite way to enjoy it?


Wednesday, November 04, 2015

Favorite Fall Soups... My Current Top 5

It's soup weather at my house!  The best thing about the changing temperatures... getting cooler... is that I start to really enjoy those foods that I tend to think of as Fall Favorites.  You know what I mean... soups, stews, chilis... and it's time to get the slow cooker out of storage, too.

I have so many Fall soups in my lineup and I find it quite difficult to pick out just a few to call favorites, but these all have something a bit unique about them and are different fromo some others that you may find on Pinterest or by Googling so I want to highlight them here and share them with you.


5 Favorite Fall Soups @WeCanBegin2Feed


Some are vegetarian, some are not, but all of them are gluten free and of course, delicious!  If you want, replace the chicken/turkey stock in any of these recipes with a veggie broth, or even plain water. The spices will take care of the flavor!

Here is the lineup.... in no particular order... with links to the original blog posts where you will find the story behind the soup, and of course, the recipe!  I hope you enjoy them as much as we do at our house.  Just click on the picture to find the link.


Roasted Red Pepper Soup
(with instructions as to how to roast red peppers in your oven)

Roasted Red Pepper Soup


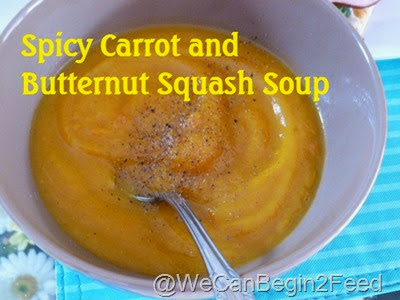
Spicy Carrot and Butternut Squash Soup


Spicy Carrot and Butternut Squash Soup


Better Than Noodle Chicken Soup

Better Thank Noodle Chicken Soup


Cauliflower and Roasted Red Pepper Soup

Cauliflower and Roasted Red Pepper Soup


Curried Coconut Sweet Potato Soup

Curried Coconut Sweet Potato Soup

What is your favorite Fall soup ingredient?


Thursday, October 22, 2015

The Ultimate English Muffin, Gluten Free and Grain Free

This recipe for my Ultimate English Muffin is one that I have been fine tuning and tweaking for the past several weeks.  I am finally satisfied that I have it right and am ready to share it. Actually, I am very excited to share it because I think it fills a real need for many of us.  It certainly has for me.

I have been living gluten free (or as much as possible) for a couple of years now, and mostly grain free, too. I have tried a few of the gluten free breads and rolls on the market and even though I have found a couple that are acceptable in taste and texture, I just don't think that all those substitute 'flours' are good for me on any kind of a regular basis.  I really don't want to eat all those carbs either. And let's not even discuss how expensive they are!

But let's be honest.  Occasionally I like to have a sandwich.  Even though my Low Carb Flatbread and Low Carb Tortillas are great, I don't always have some on hand... or thawed, as I do store them in the freezer.  I needed to come up with something new made from ingredients I normally have in the cupboard and fridge, and that make up quickly and without a lot of fuss.

These little faux English Muffins fill the bill.  I have decided to call them Ultimate English Muffins because I am using a bit of North Coast Naturals Ultimate Daily Cleanse to give them a bit of body... NCN sent me this product several months ago to sample and test, and I have been using it a lot ever since.  You can use either ground flax seed or psyllium husk (or a bit of both).  I have tested the recipe with both and it is just fine.

However, here is a bit of a warning.  Don't leave out the olive oil. They don't work. And don't use coconut oil either. I tried it. Fail.  For some reason coconut oil doesn't mix well with the hot water and cold egg whites.

I am really pleased with the texture of these little muffins.  I have eaten them untoasted and also toasted, and I prefer the latter.  They could be dressed up with the addition of cinnamon or savory herbs, I am sure.

I use a glass container to cook them in the mike. It is about 3-1/2 inches in diameter. I think you could use something a bit smaller if you like... but anything bigger will make them too thin to slice easily.

I would love to know what you think if you give them a try... and I hope you will if you are looking for a gluten free, grain free English Muffin.


Ultimate English Muffin by @WeCanBegin2Feed


Ultimate English Muffin
Makes 1 muffin
  • 1/4 cup egg whites
  • 1 Tbs hot water
  • 1 tsp olive oil
  • 1 Tbs coconut flour
  • 1 tsp North Coast Naturals Ultimate Daily Cleanse (or flax seed or psyllium husk)
  • 1/2 tsp baking powder
  1. Beat the egg whites, water, and olive oil in a medium bowl.
  2. Add the coconut flour, Ultimate Daily Cleanse, and baking powder.
  3. Beat again. The coconut flour will thicken as it absorbs the moisture.
  4. Pour batter into microwave safe dish.
  5. Cook in the mike for 2 minutes.
  6. Remove the muffin from the dish with a spatula and turn out onto a cooling rack for several minutes.
  7. Slice in half and toast if desired.
Per serving.
Weight Watchers P+ = 3.

Calories 109
Fat 6.1g
Sat. Fat 1.7g
Carbohydrates 6.1g
Sugar .5g
Fibre 3.4g
Protein 7.3g

Did you notice a change in the way I have reported the Nutritional Information for this recipe?

Starting with this recipe, I am offering more N.I. details than I previously have. I have been reading more and more lately about how important it is for us to reduce sugar and saturated fats in our diet (Zero Belly Diet by David Zinczenko) so I am going to report those statistics for my recipes.  I use either Fit Day or My Fitness Pal to do my calculations so they are as accurate as I can make them, based on the ingredients I quote.

UPDATE

Weight Watchers released their new SmartPoints food program on December 6th, 2015. It also concentrates on saturated fat and sugar, so I wanted to share the SmartPoints values for this recipe as well.


Per serving.
Weight Watchers SmartPoints = 3.

Calories 109
Fat 6.1g
Sat. Fat 1.7g
Carbohydrates 6.1g
Sugar .5g
Fibre 3.4g
Protein 7.3g


Ultimate English Muffin
Before popping into the mike.

Ultimate English Muffin
And after cooking.

Ultimate English Muffin
Cook on rack for a few minutes before slicing.

Ultimate English Muffin
After slicing....

Ultimate English Muffin
and toasting.

Ultimate English Muffin
These are toasted a bit more.

Ultimate English Muffin
With a bite gone so you can see the inner texture.

Ultimate English Muffin
And the ultimate breakfast sandwich!

Printable Recipe

What do you think? Is this something you might like to try?


Wednesday, October 14, 2015

Spicy Roasted Carrots

Ah, Thanksgiving Dinner... it's over... and we are enjoying the leftovers a little at a time.  The turkey carcass is in the freezer waiting to be hoisted into the crock pot to make soup... in a few weeks when the weather gets a bit cooler.

This year there were just the two of us for dinner so I made sure to serve things the way that The Captain likes them.  If left to his own choices, he would have a big plateful of turkey, bread stuffing, and potatoes... topped with gravy and cranberries.  So, I like to come up with a vegetable side dish that he will find particularly appealing, and that I will enjoy too.

I decided to do something with carrots.  And, rather than just cutting them up and steaming them, I chose to roast them with some spices.  It definitely made them a bit more special and added eye appeal as well.  And don't you eat with your eyes? I know I do. The spices were a nice contrast to the rest of the dinner and complimented the turkey quite nicely.

I will definitely be making this dish again.

It's easy and quick and can be prepped ahead of time... it can even be cooked ahead of time and then either kept warm or reheated if you like. I baked it in a serving dish to make it really easy.  If you are feeding a larger group, or want to have some for leftovers, double or triple the recipe and use a cookie sheet for cooking.


Spicy Roasted Carrots by @WeCanBegin2Feed


Spicy Roasted Carrots
Makes 2 servings

  • 3 large carrots, washed and cut into 1/4-inch slices, slightly on the diagonal
  • 1/2 tsp cinnamon
  • 1/2 tsp paprika
  • 1/2 tsp chili powder
  • 1/2 tsp salt
  1. Preheat your oven to 400°F.
  2. Coat baking dish lightly with a non-stick spray.
  3. Place the carrot slices and spices in a bag and shake a few times till the carrot slices are covered with the spice mixture.
  4. Pour the carrots onto the baking dish and place in the oven.
  5. Cook for 30 minutes.
  6. Remove from oven and serve warm.
If you are a Weight Watcher, then you know that carrots are a zero-point veggie... so I am not bothering with nutritional information here.

Printable Recipe

Spicy Roasted Carrots
Ready to pop into the oven.


What is your favorite way to prepare carrots?

Thursday, September 17, 2015

Sesame Chicken in the Crock Pot

Yes, another crock pot chicken recipe today... when I have the crock pot out of our storage area I like to use it two or three times before tucking it away again.  It is just too big a beast to keep in my kitchen cupboards on a full-time basis.  This time it is Sesame Chicken in the Crock Pot and it is darned good!

If you like a bit salty, and and can appreciate that bit of smoke flavor that dark sesame oil offers, then this is for you.  Basically, as with most crock pot dishes, you just put it all in the pot and let it simmer for a few hours.

I served it for dinner the first night I made it, and becuase there were just the 2 of us, I froze the leftovers and we enjoyed it again a few days later.  We chose to have it with rice for The Captain, and cauliflower 'rice' for me, along with some steamed green string beans.

If you make it with tamari it will be gluten free... if that is not a concern, then go ahead and use regular soy sauce. I have not tried it with coconut aminos... which would make it Paleo, but go ahead... I cannot see why it wouldn't work just fine.


Sesame Chicken in the Crock Pot by @WeCanBegin2Feed


Sesame Chicken in the Crock Pot
Makes 4 servings.
  • 18 ounces boneless, skinless chicken breasts
  • 3/4 cup white onion, sliced vertically
  • 2 cloves garlic, peeled, smashed and minced
  • 1/2 cup tamari
  • 2 tsp dark sesame oil
  • 1 Tbs tahini
  1. Lightly coat crock pot with non-stick spray or for easy cleanup.
  2. Cut chicken breasts into 1-1/2 inch chunks and place in bottom of crock pot.
  3. Spread the onion slices and garlic over the top of the chicken.
  4. In a small bowl, mix together the tamari, dark sesame oil and tahini.  Don't worry if it doesn't completely blend smoothly.
  5. Pour over the contents of the crock pot.
  6. Cover and cook on LOW for 4 or 5 hours.
  7. Remove and serve over rice, quinoa or cauliflower rice.
Per serving.
Weight Watchers P+ = 5.
Calories 177; Protein 28g; Carbohydrates 6g; Fat 5.5g; Fibre .5g.


Sesame Chicken in the Crock Pot by @WeCanBegin2Feed
Over rice for him...


Sesame Chicken in the Crock Pot by @WeCanBegin2Feed
and cauliflower rice for me.


Are you a fan of smoky dark sesame oil, too?

Have you taken your crock pot out of storage yet this Fall or do you use it all year round?


Saturday, July 18, 2015

Healthful Gluten-Free Waffles

Most of the waffles I have been making lakely have been with a mixture of protein powder and egg whites with with a pinch of baking powder thrown in...  they are really tasty, make up quickly, and have lots of protein... great on mornings when I am in a hurry to get moving.

But sometimes I like to take more time preparing a heartier breakfast... that often turns into brunch, really. That is the case with what I am calling my Healthful Gluten-Free Waffles.  'Healthful' because of the ingredients I have chosen to use in them.  And heartier because they kept me satisfied right through my normal lunch time.

I should also add that The Captain loved them... win win win!


NCN Ultimate Daily Cleanse


I have had a bag of North Coast Naturals Ultimate Daily Cleanse sitting in my pantry for several months now.  It was in the last shipment of goodies I received to test and I admit to being somewhat intimidated by it... not really knowing what to do with it. But, today, when I thought I would use some ground flax seed in my new waffle mixture, I decided to open that bag and try some of the Ultimate Daily Cleanse instead. I am so glad I did!

It is a mixture of six natural ingredients:
  • Ground 100% Canadian prairie flax seed (soluble & insoluble fibre & EFAs)
  • Ground psyllium seed husk (soluble & insoluble fibre)
  • Inulin fibre from chicory root (prebiotic fibre)
  • Ground organic sprouted chia seed (superior nutrients, fibre and EFAs)
  • Ground organic sprouted brown rice bran powder (soluble & insoluble fibre)
  • Probiotics (1 billion good bacteria cells from non-dairy lactobacillus fermentum; provides the same healthy probiotic goodness associated with yogurt, without the taste or the dairy)
And I should add that it is dairy free, soy free and wheat/gluten free as well.... an all-natural blend that promotes healthy regularity.  You can check it out at North Coast Naturals web site if you are interested.

Okay then...

So as to start out gently and ease into using it, I substituted 2 Tbs of the Ultimate Daily Cleanse for the 2 Tbs of ground flax seed that I would have used in this recipe.  I didn't notice any taste or texture whatsoever.

I used a bit of maple syrup, some banana slices and shredded coconut to dress up my waffles.... so delicious!


Healthful Gluten-Free Waffles


Healthful Gluten-Free Waffles
Makes 2 servings

  • 4 whole eggs
  • 1/4 cup unsweetened vanilla Almond Breeze
  • 2 Tbs Ultimate Daily Cleanse
  • 1/4 cup coconut flour
  1. Crack the eggs into a medium bowl and beat till fluffy.
  2. Add the rest of the ingredients and beat again till the batter is smooth. It will be lumpy. Keep beating.
  3. Pour half the mixture into a hot waffle iron and allow to cook about 5 minutes.
  4. Remove to plate. Cover to keep warm.
  5. Repeat with second half of batter.
  6. Serve with your favorite waffle toppings.
Per serving without toppings.
Weight Watchers P+ = 6.
Calories 232; Protein 15g; Carbohydrate 11g; Fat 14g; Fibre 8g.


Mix that batter
Keep mixing the batter till the lumps are gone!


Just cooked waffles
Cover the cooked waffles till all the batter has been used.


Dressed up waffles
And then dress them up before serving!


I did receive this product free of charge to use in my own kitchen and was under no obligation to review it.


What is your favorite way to get healthy fibre into your daily diet?

Wednesday, May 27, 2015

Slow Cooker Pork Vindaloo

I recently returned from a 17-day cruise and a lot of people have been asking me about the food and meals served on the ship… “ Isn’t everything covered with fat-laden sauces?  Were you able to eat gluten-free?  How did you manage to resist all the desserts? “

I admit to submitting to a few temptations but all in all, it was very easy to maintain a healthy diet while on board… there was an abundance of fresh fruit and vegetables. Lean meats, eggs, and fish were available all the time. The chefs were more than willing to cook according to your liking.  And yes, there were plenty of decadent desserts, too.  But every day there was one sugar-free dessert and one gluten-free dessert so that certainly made things a bit easier.  The pavlova was fabulous!

My favorite thing about the ship’s cuisine, though, was the enormous variety of ethnic dishes.  Because passengers hail from all over the world, the chefs go all out to please everyone and make it easy to find your favorite dishes at each meal. For example, at the breakfast buffet, along with all the different things we Westerners would expect, there were a couple of different hot soups, warm and cold stewed fruits, and cold smoked fish with assorted condiments.  It was wonderful to be able to try some things that we never would have at home.

And dinner was even more fun. I learned to really look forward to the Indian dishes on the evening menu.  One that I came to particularly enjoy was Pork Vindaloo.  I had it a couple of different times and really loved it… so when I got home I started looking for recipes.  I couldn’t find any that I really liked so I ended up making up my own and it turned out pretty well.

I chose to do it in the slow cooker so that it could simmer away while I was at work, and when I came home, the kitchen smelled absolutely wonderful!  I could barely wait to dig in.  That first night we had this served over rice… and I froze the remaining 6 portions.  The second time we had it, I served it with red potatoes and vegetables. Wonderful!  Do give it a try.  It would be really good with quinoa or farro too.

I know I will be making this often… and I think that I will try using crushed tomatoes the next time, instead of diced. It will be a bit thicker I think.  I also think that a spoonful of plain yogurt alongside would be really nice.  If you like this dish I hope you will consider trying my version.  It’s easy and all comes together quite easily.


And just a hint…I like to spray the inside of my slow cooker with a non-stick spray for easy cleanup.


Slow Cooker Pork Vindaloo by @WeCanBegin2Feed


Pork Vindaloo
Makes 8 servings
  • 1-1/2 Tbs fresh ginger root, peeled, and grated 
  • 2 tsp garam masala
  • 2 tsp dry mustard
  • 1/2 tsp salt
  • 1-1/2 tsp ground cumin
  • 1/2 tsp red pepper flakes
  • 1 boneless pork loin roast, trimmed and cut into 1-inch pieces, approximately 32 ounces
  • 2 cups chopped white onion
  • 6 garlic cloves, peeled, crushed, and minced
  • 1 can diced tomatoes, 28 ounces
  1. Combine first 6 ingredients in a large bowl.
  2. Add the pork and toss well to coat the pieces with the spice mixture.
  3. Place a large non-stick skillet on the stove over MEDIUM heat.
  4. Add the pork to the pan.
  5. Cook 5 minutes or until pork is lightly browned on all sides.  Stir occasionally.
  6. Place the pork in a slow cooker that has been coated with non-stick spray.
  7. Add onion and garlic to pan.
  8. Saute about 5 minutes or until onion is softened.
  9. Scrape pan to loosen browned bits and then add with onion and garlic to the slow cooker.
  10. Add tomatoes to the slow cooker and spread over the onions, garlic, and pork..
  11. Cover and cook on LOW for 7 hours or until pork is tender.
  12. Remove from slow cooker and divided into 8 servings.
  13. Serve with rice or potatoes and veggies.
Per serving.
Weight Watchers P+ = 5.
Calories 213;  Protein 26g; Carbohydrate 9g; Fat 7g; Fibre 2g.


Printable Recipe

Slow Cooker Pork Vindaloo by @WeCanBegin2Feed


Slow Cooker Pork Vindaloo by @WeCanBegin2Feed


Slow Cooker Pork Vindaloo by @WeCanBegin2Feed

Are you a fan of Pork Vindaloo?  What is your favorite Indian dish?


Thursday, April 23, 2015

Plantain Sandwich Bread

I am going on vacation in a few days and won’t be posting anything new for the next few weeks so I want to leave you with something new that I am very excited about. I call it Plantain Sandwich Bread.  It is gluten free, grain free, Paleo and vegetarian.  And there are only 2 ingredients.

I have been reading about plantains for some time now and was finally intrigued enough to really search for them at my local markets last week.  I did find some and purchase a fairly large one.  I let it sit on the counter about 5 days before it turned yellow and looked ripe enough and felt soft enough to use.

After looking at the nutritional information for plantains I decided that there is enough carbohydrates in them to think about using them in pancakes, waffles, flatbreads, and the like, so I started looking on Pinterest for different ideas.  And I found lots of them, most having several ingredients.  So, after tossing some ideas around it my head, I decided to start out with something very simple and put together this bread.

It is a softer bread than my Low-Carb Flatbread but not as soft and pliable as my Low-Carb Tortillas, both of which are made with cauliflower and eggs.  This Plantain Sandwich Bread is also slightly sweeter than those, too.  Now that makes sense, as the plantain is much more like a banana and is certainly starchier and sweeter than cauliflower.

I purchased a large plantain. It weighed about 16 ounces before I peeled it. And it peeled much like a banana does, although the skin is a bit thicker and not as pliable as a banana peel.
I think I might have found a new favorite ingredient here! 

This bread is soft like a real flour-based bread and can easily be folded. I have used it to make both open-faced and closed sandwiches.  And it can be popped into your toaster as well.  Very versatile. Very easy. Very quick. I hope you will give it a try.


Plantain Sandwich Bread


Plantain Sandwich Bread
Fills a standard size cookie sheet

  • 1 large plantain (15 – 16 ounces before peeling)
  • 3 large fresh eggs
  1. Preheat your oven to 375°F.
  2. Line a cookie sheet with parchment paper.
  3. Peel the plantain and cut into slices and place in food processor or blender.
  4. Add 3 fresh eggs to the plantain and puree till smooth and thick.
  5. Pour the mixture onto the parchment paper and spread almost to the edges of the cookie sheet.
  6. Bake for 25 minutes.
  7. Remove from the oven and lift the paper off the cookie sheet and set on wire baking racks for about 2 or 3 minutes.
  8. Gently flip over and carefully peel the paper away from the bread.
  9. Allow to cool before cutting into 12 rectangular pieces.

The whole recipe.
Weight Watchers P+ = 16.
Calories 673; Protein 24g; Carbohydrate 119g; Fat 5g; Fibre 8g.

I cut mine into 12 slices for sandwiches and used 2 per serving.
Per serving.
Weight Watchers P+ = 3.
Calories 112; Protein 4g; Carbohydrate 20g; Fat 3g; Fibre 1g

UPDATE

This is a recipe that I use a lot so wanted to make sure to translate the N.I. into Weight Watchers SmartPoints (new Dec 6th, 2015).  Here is how it shakes out...

The whole recipe.
Weight Watchers SmartPoints = 27.
Calories 673; Saturated Fat 5g; Sugar 60g; Protein 24g.

I cut mine into 12 slices for sandwiches and used 2 per serving.
Per serving.
Weight Watchers SmartPoints = 4.
Calories 112; Saturated Fat 1g; Sugar 10g; Protein 4g.Protein 4g.

Obviously the high sugar content in the plantain is what has driven the values higher in the new SmartPoints calculation.  Still worth it to me, however!


Plantain
My plantain was ripe and had some brown spots on the peel.


Cut and Peel Plantain
I sliced the ends off and then cut it in half to make it easier to remove the peel. Then I cut down the length of one half and slowly pried the cut apart with my fingers.


Batter
Whizzing the plantain and eggs together in my food processor.


Thick batter
A thick and frothy batter.


Peeling paper
Remove the bread, still on the paper from the cookie sheet. Then flip it over and gently peel the paper away from the bread while it is still warm.


Face Down 2
After the paper is removed completely…


Face up
flip it over and allow it to cool for a few minutes before…


Cut
cutting it into slices. 


On plate
I put 2 slices on a dinner plate to give a better idea of their size.


Plantain Sandwich Bread 2
They are nice for open faced sandwiches but not too thick for a closed sandwich too.


With soft cheese and cucumber
And the bread is also strong enough to be spread with semi soft cheese or butter or nut butter, too.


I would love to know if you are using plantains in your kitchen these days and what you like to make with them.