Showing posts with label gluten free. Show all posts

Wednesday, February 28, 2018

Cauliflower Ham Waffles... Low carb and low fat too. Delicious!

For the past few months I have been doing a lot of experimenting with different kinds of foods, fine tuning my diet in order to find out how various foods and drinks affect me... my mood, my athletic performance, my sleep, my weight, and the amount of inflamation they cause.

Sadly, I have discovered that red wine affects me quite negatively... I do not sleep well, and I get cramping in my legs during the night that even an evening dose of magnesium no longer prevents.

On a positive note, I have also discovered that a low carb, even to the point of being in ketosis, agrees with me very well.  I thrive on healthy fats... avocado, nuts and nut butters, cream and oils... coconut, avocado and olive are my favorites.  I love making my own nut butters. I like leafy green and crunchy veggies... and the occasional bit of fruit. I do not miss grains and grasses and as much as I do like the taste of them, I am not missing squashes and beans.  I do occasionally have a high carb dayl.. perhaps a bit of sushi or some edamame and a Starbuck's specail coffee, and then happily get right back on a low carb regimen the next day.  It is all good. I am happy and in a groove. 

This morning I was wanting something substantial for breakfast and knew that I had a bit of riced cauliflower in the crisper that needed to be used or tossed soon, so I put together these Cauliflower Ham Waffles pretty quickly.

They are low carb, and actually low fat too.  I did add some sugar free syrup on top before I ate them, but next time I think I will go the savory route and add a bit of salt and them some sriracha or even salsa.  If you are a keto enthusiast, add some avocado or olive oil to the mix.

I have been purchasing cauliflower already riced... but if you have a head of cauliflower, break a few florets off and put them in your blender or food processor and whizz till they are broken down into large rice shaped crumbles.

Cauliflower Ham Waffles by @WeCanBegin2Feed

Cauliflower Ham Waffles

Makes 1 serving.

Ingredients:
  • 85g (3 oz.) riced cauliflower - approximately 1 cup
  • one large fresh egg
  • 2 slices extra lean deli ham
Instructions:
  1. Place cauliflower rice in a medium microwave bowl (I used a glass measure cup) and cook on HIGH in mike for 3 minutes.
  2. Remove from mike and allow to cool for a few minutes.
  3. Turn on waffle iron and allow to get hot. I use a nonstick spray in mine.
  4. Add egg to cauliflower.
  5. Cut ham into small pieces and add to cauliflower.
  6. Combine cauliflower, egg and ham and pour mixture into waffle iron.
  7. Cook about 5 minutes till outside is crispy and browned, and remove to plate.
  8. Top as desired.
Per serving without toppings. *
Weight Watchers Freestyle Smart Points = 1.
Calories 146
Fat 6g
Saturated Fat 2g
Sugar 2g
Protein 18g

* The nutritional information for the ingredients I used.  Yours will depend on  your own ingredients.

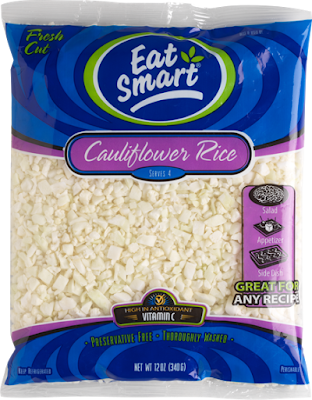
Cauliflower Rice
This is the cauliflower rice I am currently using. I am including this picture to illustrate the size and shape that the cauliflower rice crumbles will look like if you make your own in a blender or food processor. Picture is taken from the Eat Smart web site.

Cauliflower Ham Waffles
Mixture in waffle iron before cooking. You can see that it is fairly thick and not runny so does not make a mess in the waffle iron.


Cauliflower Ham Waffles
Waffles slightly browned, and ready to easily remove from waffle iron.


Cauliflower Ham Waffles
Waffles are plated and ready to top... or even eat just as is.  Enjoy!


What do you think?  If this is something you might enjoy, I hope you will consider sharing or Pinning!


Friday, October 20, 2017

Roasted Red Pepper and Tomato Soup

Ah, Fall. I have such mixed feelings about the change of seasons.  Let's see... I really don't like that the days are getting shorter and cooler.  And I am not happy about the rainy days we are having right now either, even if we really need the rain after the unusually hot and dry Summer we enjoyed!  On the other hand, I do love that some of my very favorite things to eat are more readily available and more reasonably price with the onset of the Fall harvest.

One of these favorite things is red peppers!  And when they are on sale at my local market, I buy a huge bagful and always roast some almost immediately. I love them sliced up on salads, and in omelets, on burgers, and especially in home made soups.  Today I am sharing a quick and easy way to put together a lovely one... Roasted Red Pepper and Tomato Soup.

It is just a matter of roasting the peppers and then pureeing them with a can of diced tomatoes.  If you are not sure how to do this, I have included a link to a little tutorial about it in the first recipe instrucion (which also has another delicious soup recipe).  It is so easy... just takes a bit of time.  You can season  your soup with basil and oregano, or leave plain and just add some salt and pepper. As is, it is vegan but if you don't care about that, you can  make it a little fancier and even company-worthy with the addition of a sprinkle of grated parmesan cheese.  It is truly delicious!

You might enjoy this soup as a first course at dinner, or as your main course at lunch. I have even slurped a bowlful as an afternoon snack.    Yes, the best part about Fall is definitely homemade soup!

Roasted Red Pepper and Tomato Soup by @WeCanBegin2Feed


Roasted Red Pepper and Tomato Soup
Makes 4 servings, approximately 1 cup each

Ingredients:

  • 3 red peppers
  • 1 28-ounce can (798 ml) diced tomatoes
  • salt and pepper to taste
  • dashed of basil and oregano (optional)
Instructions:
  1. Roast red peppers and allow to cool before removing seeds and skin.
  2. Place the peppers in a large bowl along with the tomatoes.
  3. Puree the veggies with immersion blender and pour into to saucean to heat.
  4. Warm soup to desired temperature over MEDIUM heat on stovetop.
  5. Remove to serving bowls and season.  Garnish as desired.
  6. Leftover soup may be stored in refrigerator for a couple of days or frozen.
1 serving, without garnish
WW SP = 0 (vegetables are 0 SP foods so nothing to count here)
Calories 70
Saturated Fat 0g
Carbohydrates 14.1g
Fibre 3.6g
Sugars 5.1g
Protein 2.6g


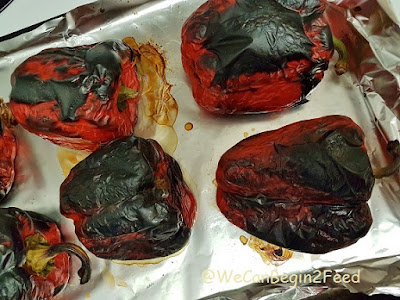
Red Peppers on baking sheet
I always make a few extra, for omelets, burgers, salads...  yum!


After seeding and removing the skin.


Season with salt and pepper, and a bit of dried basil and oregano if you like them.


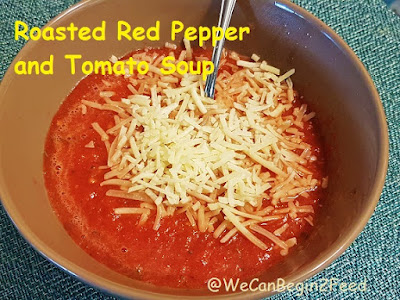
A bit of shredded parmesan cheese adds a lot of flavor and only a few calories.

Are you a fan of roasted red peppers, too?  What is your favorite way to enjoy them?


Friday, May 19, 2017

Oat Scones... I Still Love Them

No matter what new food plan I set out to try, I always come back to an old favorite... tried and true... from Weight Watchers. It has gone through several evolutions, but for many years now, has been called the Simply Filling Technique.

In its simplest form, it involves eating from a comprehensive list of fruits, vegetables, lean proteins including meat and dairy, whole grains, and healthy oils.  It is based on whole, real foods.  Easy. Simple. Nutritious, and yes, filling.  Whole, real food fill you up and keep you satisfied. It is true.

I like the plan as I naturally gravitate to these kinds of foods and like to shop and prepare my meals at home, whether I am going to eat there or pack them along with me to have out.  I am a big fan of park bench and beachside picnics and snacks.

The plan does allow for occasion off-list indulgences, so I can still get in some nut butters and dried fruit, and the occasional glass of wine, too. No deprivation here.

Now, I admit, I don't eat a lot of grains. I prefer to get my carbs from fruits and veggies... I will occasionally eat some rice when I have sushi but for the most part, even quinoa only makes a rare appearance on my plate.... usually when I make a bowl-style lunch.  I cannot recall the last time I cooked oatmeal at breakfast.

But I was looking through some old posts and this recipe for Oat Scones piqued my interest. I had completely forgotten about it.  They really appealed to me, I decided to make them up and add them to my week's menu.  And I am happy to say they were as good as I remember.

I  have learned over the years that weighing dry foods on a scale, rather than measuring with cups is a more accurate way to calculate nutritional values. My original recipe, which you can find here, calls for 1-1/2 cups of oats. The package shows that 40g is equal to 1/2 cup so I weighed out 120g of oats instead of measuring 1-1/2 cups.  When I compare them, the 120g is less for sure.   I also weighed the oat bran.  I used 95g instead of measuring out 1 cup.

Do I need to even mention I use gluten free oats?

And I chose a rectangular cake pan because I currently do not own a pie plate. The cake pan is about 8 inches X 11 inches.  I cooked the scones for 40 minutes and made sure to let them rest for 15 minutes before I cut them into 8 pieces and tested them.  That waiting was hard!

I have been enjoying them all week... my favorite way is to make up a bit of PB2 and slather that all over the top.

Oat Scones by @WeCanBegin2Feed

Nope, PB2 is not part of the Simply Filling Technique... you have to count 1 Smart Point for it.  And nope, I do not usually use a fork to eat it either!

I have since learned that if I cut the scone in half horizontally, it lasts twice as long... and half a scone is actually sometimes all I want!  Imagine.


So, if you follow the Simply Filling Technique, these Oat Scones are a no-count food.  If you top them with something not on the list, just count those Smart Points.  And if you are a Weight Watcher who counts Smart Points, here is the pertinent nutritional information for you.

Per serving of 1 scone or 1/8th recipe
Weight Watchers SP = 4.
Calories 122
Saturated Fat .5g
Sugar 3g
Protein 6g

Is oatmeal part of your food plan?  What is your favorite way to enjoy it?


Tuesday, April 04, 2017

Homemade Roasted Almond Butter

For the past couple of weeks I have been spending way too much time with my dentist... Oh, don't misunderstand me.  I really like my dentist. He seems to be a very nice man.  But I had a loose filling one one of  my upper left molars which, when removed, revealed a cavity, and also a crack in one of my upper right molars...  all of which led to needing 2 crowns.  The prep work was killer and now I feel like a princess with the price I had to pay for these lovely crowns!

But the real downside here is that I can no longer eat whole almonds.  I love, love, love almonds... raw almonds mostly, but I also enjoy them roasted, plain or salted, and even hickory smoked... you present them to me, and I will eat them.  Happily.  But no longer... apparently that is likely what cracked my tooth and I was informed by the dental assistant that none of us with large fillings should really eat hard nuts of any kind or size.  Come to think of it I had a cracked tooth a few years back and it was likely from the same thing. Drat.

So, what to do with this huge stash of raw almonds I now have in my pantry thanks to a great sale at Costco last month?  Why, make almond butter, of course!  And it was actually easier than I thought it would be.  Way easier!

I decided to make small batches of almond butter and store it in a glass container in the refrigerator. So I started with 2 cups of nuts, and roasted them in the oven and put them into my food processor while still very warm from the oven... turned it on and waited to see what would happen.  At first I thought my food processor was not adequate. I could see that the nuts were ground into almond meal, but then all of a sudden it happened... creamy, almond butter!  I had to taste it right away of course.

And it is delicious. And it is thick and creamy. I am hooked!

Now I know you can add flavors if you like... cocoa, cinnamon, maple syrup, coconut... you name it.  And I just may try that. But to store it, I am leaving it plain, and then can add other goodies to it once I get over the novelty of having it at all.  I actually quit buying almond butter a couple of years ago when the price went past the point of what I call affordable. 

So here it is... plain old almond butter.  And I love it!  Hope you will too.

Homemade Roasted Almond Butter by @WeCanBegin2Feed


Homemade Roasted Almond Butter
makes about 1-1/2 cups

Ingredients:

  • 2 cups raw almonds

Instructions:
  1. Preheat your oven to 350 F.
  2. Line a baking sheet with parchment paper.
  3. Place the almonds on the baking sheet and spread them out so they are in a single layer.
  4. Roast the almonds in the oven for 10 minutes.
  5. While the almonds are roasting, set up your food processor with the S shaped cutting blade.
  6. Remove the almonds from the oven and put them into the food processor immediately. You want them to be hot when they are being processed.
  7. Puree on HIGH for a couple of minutes at a time, stopping to scrape and push the ground nuts down into the center.
  8. It will take about 10 minutes for the almonds to become a creamy butter texture.
  9. Remove to storage jar and store in fridge for up to a couple of weeks.
Per 1 Tbs serving.
Weight Watchers Smart Points =3.
Calories 95;
Fat 8g;
Saturated Fat .75g;
Carbohydrate 3g;
Sugar 1g;
Protein 3.5g

These values are meant to be used as a guideline.

Printable Recipe


Homemade Roasted Almond Butter by @WeCanBegin2Feed
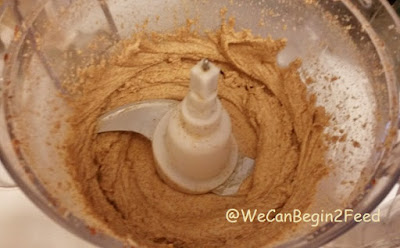
Puree the roasted, still hot almonds in the food processor till a creamy butter appears!

How about you?  Are you an almond butter fan?

Have you made your own nut butters?


Friday, June 03, 2016

3 Ingredient Frozen Skinny Chocolate Pies

Wait. What?  Frozen Skinny Chocolate Pies? And only 3 ingredients?  That's right. It's true. And they are fabulous!  Just a little bit of chocolately goodness and it's frozen so just perfect for these warm Summer days. Gluten free, almost fat free too.

I have no idea where this recipe started but I can tell you I found it on the new social media channel called Connect, on the Weight Watchers Canada app.  They are calling it a rather crass name that I won't repeat... totally unappealing... so I have changed the name but not the ingredients or the goodness!

So what is in these little goodies, you are wondering? What makes them skinny?  Well, they are made from coco powder, and de-fatted peanut flour and a banana.  I happened to use Protein Plus peanut flour the first time I made them, and have used PB2 since then, and I am sure they would be just as good with chocolate PB2 as well... and I hear there is a new de-fatted peanut flour around now too, called PB & Me. Haven't seen it yet, but when I do, I will be trying it for sure.  I really think these de-fatted peanut flours are a Weight Watchers best friend!

The whole recipe is only 1 Smart Point on the Weight Watchers program.

So, let's get to it, shall we?


3 Ingredient Frozen Skinny Chocolate Pies
Makes 6 pies

Ingredients:

  • 1 medium banana
  • 1 Tbs unsweetened cocoa powder
  • 2 Tbs de-fatted peanut flour of choice
Instructions:
  1. Mash the banana in a medium bowl.
  2. Add the cocoan and peanut flour.
  3. Blend well.
  4. Spoon mixture into 6 silicone muffin cups.
  5. Freeze at least 2 hours. 
  6. Eat frozen.
Per serving of 6.
Weight Watchers Smart Points = 1*

N.I. per individual pie with Protein Plus peanut flour:
Calories 30
Fat 1g
Saturated Fat 0g
Carbohydrates 6g
Fibre 1g
Sugar 3g
Protein 2g


N.I. per individual pie with PB2 peanut flour:
Calories 28
Fat 0g
Saturated Fat 0g
Carbohydrates 6g
Fibre 1g
Sugar 3g
Protein 1g

*On the Smart Points program, bananas are zero points, and 1 Tbs of cocoa powder has zero points, so the only thing to count is 1 SP for the de-fatted peanut flour.


Mix ingredients in bowl
Mash the banana and then add the other ingredients.


Mix well
Mix till well-combined. Batter will be lumpy.


Place in silicone muffin cups
Place in silicone muffin cups.


Taste test
Enjoy your frozen treat!

What's your favorite quick frozen treat to make in the Summer?

If you like this recipe, won't you consider PINning it please?

Thursday, May 19, 2016

Spicy Slow Cooker Chick Pea and Butternut Squash Stew

I do love my slow cooker. Especially for these dump style meals... put everything in the slow cooker, turn it on, and walk away. How easy!  Gotta love that, right?  This Spicy Slow Cooker Chick Pea and Butternut Squash Stew is truly delicious... and very easy.  And if you have been trying to get more veggies into your diet, like I have lately, this is right up your alley!

I was craving something a bit spicy even though our weather has been fabulous!  I wanted something with an Indian flavor, but not really a 'curry' as such, so I chose spices that would compliment turmeric, but not get overwhelmed by it. I think I found the right balance.  The Captain loved it... and was quite pleased that it didn't taste like curry, even though the veggies definitely took on that usual yellow hue that turmeric causes.

I think you will find it quite nice... especially if real curry is not really your jam either!

Don't be intimidated by the list of vegetables that I used. Get creative and use your own favorites. Cauliflower would be good here... so would green peas.

I froze the leftovers in individual one-cup servings so they can be easily thawed and used for quick meals on busy days. Win win.


Spicy Slow Cooker Chick Pea and Butternut Squash Stew
Makes 10 one-cup servings.

Ingredients:
  • 1 15-ounce can chickpeas, drained and rinsed
  • 1 28-ounce can diced tomatoes
  • 6 ounces zucchini, cut into cubes
  • 4 ounces onion, sliced vertically quite thin
  • 16 ounces butternut squash, peeled, seeded and cut into cubes
  • 3 ounces whole green beans
  • 4 ounces carrots, cut into chunks
  • 1 ounce raisins
  • 1/2 can water, use the diced tomato can
  • 1/4 tsp each of cardamom, garam marsala, coriander
  • 1/2 tsp cumin
  • 1 tsp each of cinnamon, turmeric
  • healthy dash black pepper

Instructions:
  1. Open cans, and prepare vegetables.
  2. Coat the inside of your slow cooker lightly with a non-stick spray for easy cleanup.
  3. Layer the vegetables in the slow cooker.
  4. Mix the spices in a small bowl and then sprinkle over the veggies.
  5. Add the tomatoes and the water and then stir.
  6. Cook on LOW for about 8 hours.
  7. Serve warm over carb/grain of your choice... quinoa, rice, noodles, barley, wheatberries, freekah, farro.
Per serving, stew only.
Weight Watchers Smart Points = 1*

Calories 119
Fat 1g
Saturated fat 0g
Carbs 24g
Fibre 7g
Sugar 7g
Protein 6g

* Chick Peas is the only item on this list that has a points value in the Weight Watchers Smart Points program

Everything into the slow cooker and set to cook on LOW for 8 hours.  It looks like not a lot of liquid to start, but the veggies create juice as they simmer. Stir once or twice if you during the cooking time to make sure everything is eventually covered and bubbling.


I served over macaroni noodles for The Captain.


What do you call these legumes?  Chick Peas or Garbano Beans?

If you like this recipe I hope you will consider Pinning it!  Thanks so much.


Sunday, April 03, 2016

Avocado and Egg Salad

I picked up a bag of 5 very large, and almost ripe, avocados at Costco one day last week.  They are absolutely delicious... is there anything more delightful than a perfectly ripe avocado?  I have been trying to think of new ways to eat them up... and came up with this Avocado and Egg Salad for dinner.

I want to try a few new things that I hope The Captain will enjoy as well.  He is not always very keen on the creamy texture of plain avocado.

In the Spring and Summer when we are spending more and more time outdoors, I keep some things on hand in the refrigerator to put together quick meals.  Hardboiled eggs is one of my favorite go-to items... so while I washed and cut up some greens, The Captain peeled some eggs, and our dinner came together rather quickly.

And it was wonderful!  I am sharing the ingredients I used for 2 fairly large dinner salads.  I think the next time I make this, I will try adding some crumbled bacon and some capers for garnish and a flavor boost.


Avocado and Egg Salad

Avocado and Egg Salad
Makes 2 servings

Ingredients:
  • 2 to 3 cups salad greens, washed and dried
  • 10 grape tomatoes cut in half
  • 3 or 4 thin slices of red onion
  • 1/2 cup fresh parsley, chopped
  • 1 mini cucumber, cut into slices
  • 2 hard boiled eggs, peeled and slices
  • 1 large avocado, washed, peeled and cut into chunks
  • Salt and pepper
For the dressing:
  • 2 tsp olive oil
  • 1/1/2 Tbs apple cider vinegar
  • splash of lemon juice
Directions:
  1. Place the salad greens in 2 serving bowls and set aside
  2. Put the tomatoes, red onions, parsley, cucumber, eggs, and avocado in a medium mixing bowl.
  3. Mix the dressing ingredients together in a small bowl and pour over the eggs, etc in the mixing bowl.
  4. Toss gently.
  5. Spoon the mixture over salad greens and serve with salt a pepper to season.
Per serving.
Weight Watchers SP = 8.  *
Calories 273
Saturated Fat 5g
Sugar 2g
Protein 9g

* Using the Weight Watchers Recipe Builder (which will not add points for the onion, cucumber, tomatoes, and parsely, it comes to 8 SP. If you calculate using the N.I. it will come to 9 SP)


Not only pretty but delicious and filling too!


The Captain had some rye bread toast with his!


If you are interested in learning more about the health benefits of avocados and other interesting facts about them, please check out this article called 13 Health Benefits of Avocado.


Tell me you love avocados too!  What is your favorite way to serve them?

If you like this idea, I hope you will PIN it!


Thursday, February 25, 2016

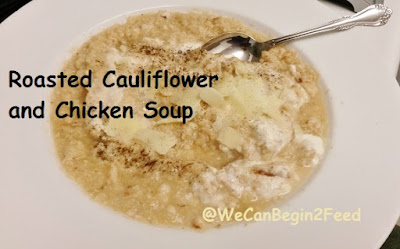
Roasted Cauliflower and Chicken Soup

I have been buying up cauliflower like a crazy person lately. All Winter long they were so expensive... I saw them as high as $6.95 per head... and now that they are a decent price again, I cannot stop buying them!

But I can only eat so much Low-Carb Flatbread and Cauliflower Rice, so have been trying to come up with some new ways to enjoy all of this glorious cauliflower.  This soup was an experiment for sure, and a happy one as it turned out so well.   We almost always have some roasted chicken breasts in the refrigerator as I tend to do them in batches of 3 or 4 every few days so I have some on hand for salads or for The Captain's favorite fried rice dish at lunch time.

I used a bit of fat free yogurt in this dish to give it a creaminess, but you could leave it out if you are eating Paleo.  This soup is naturally gluten free.

Roasted Cauliflower and Chicken Soup

Roasted  Cauliflower and Chicken Soup
Makes 2 servings.

Ingredients:
  • 4 cups cauliflower, washed and broken into florets
  • 1/2 cup onion roughly chopped
  • 2 tsp olive oil
  • 2 cups chicken broth
  • 1 tsp minced garlic
  • 1 cooked chicken breast, about 6 to 8 ounces, cut into small chunks
  • 1/2 cup fat free plain Greek yogurt
  • Salt and Pepper to taste
Instructions:
  1. Preheat your oven to 375°F.
  2. Line a baking sheet with foil and lightly coat with a non-stick spray.
  3. Spread the cauliflower florets and onion pieces on the foil and drizzle or spray with the olive oil.
  4. Place in oven and roast for 30 minutes. 
  5. Remove from oven and place the veggies in a stockpot or large sauce pan.
  6. Add the chicken broth and garlic to the veggies and bring to a boil.
  7. Simmer for about 5 minutes.
  8. Add the chicken and heat through about 5 more minutes.
  9. Remove from heat and then puree with an immersion blender till the chicken is shredded.
  10. Divide the mixture between 2 bowls and then stir 1/2 cup of yogurt into each.
  11. Season with salt and pepper.
You can garnish your soup in a variety of ways... I had a few pieces of shaved parmesan cheese on mine and it was delicious. I think crumbled bacon and chopped green onions and a bit of shredded cheddar would be really nice too.

Per serving without garnish.
WW Smart Points = 5.
Calories 243; Saturated Fat 1g; Sugar 10g; Protein 36g.

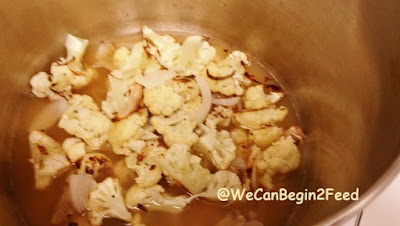
Roasted Cauliflower and Onions
Roasted cauliflower and onions


Leftover cooked chicken breast, cut into chunks


Into the stockpot with broth


Garnished and ready to serve


Are you a cauliflower fan, too?

What's your favorite way to enjoy it?


Monday, February 15, 2016

Spicy Pumpkin Protein Pancakes

I am finally back on track with regular workouts after our move to a new apartment in January.  And the new building has a fitness room, so we have decided to take advantage of the space... we can spread out our mats and even jump up and down if we want to, without having to worry about making too much noise.  There are lots of machines and equipment that I haven't even had a chance to check out yet!

On days when I am going to do a mid-morning workout, I like to add some carbs to my breakfast to make sure I have enough energy to finish. Usually I would be happy with some fruit blended into a protein shake, but it has been raining monsoons here the past couple of days so something warm seemed much more to my appealing.

I decided to use the last of my North Coast Naturals vanilla Vege Pro-7 protein powder and make some spicy pumpkin pancakes... I had only half a scoop left and I knew just what to do with it.  I am really sad to see the bottom of this container.  I was given this protein powder to try some time ago and have really enjoyed it... it has great body and is really quite filling.  I will need to get more!


North Coast Naturals

I mixed all the ingredients with my immersion blender and then cooked the batter in 3 batches.  It takes a bit longer to do them this way, and the batter really needs to cook completely through, otherwise you have doughy centres in the pancakes, and who likes that?  Not me, for sure.

I did the calculations and the batch of 3 cakes comes out to 6 Smart Points on the new Weight Watchers program... add a bit of sugar-free syrup for another 1 Point or some 0 Point fruit if you like. I chose to have half a navel orange alongside instead...  I really enjoyed them and hope you will too.

Make sure you are using gluten-free oats if that is an issue for you.  And yes, I know that the coconut oil is saturated fat, but I happen to believe it is good for me and I love the taste!

Spicy Pumpkin Protein Pancakes


Spicy Pumpkin Protein Pancakes
Makes 1 serving of 3 cakes.

Ingredients:
  • 1/2 scoop vanilla protein powder
  • 1/4 cup canned pumpkin
  • 1 tsp coconut oil
  • 2 Tbs egg whites 
  • 5 Tbs water
  • 1/4 cup old fashioned oats
  • 1/2 tsp cinnamon
  • dash of nutmeg
Directions:
  1. Blend all the ingredients together till batter is smooth.
  2. Cook pancakes in 3 batches and keep cakes warm till ready to serve.
  3. Serve with syrup or fruit.
Per serving of 3 cakes without topping.
WW Smart Points = 6.
Calories 200; Saturated Fat 4g; Sugar 3g; Protein 17g.

Pancake Batter
Mix the ingredients till smooth with your blender.


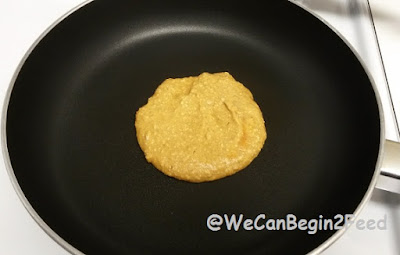
Pancake in pan
Make sure the cakes aren't too thick or they will take much longer to cook through.. and don't forget to flip and cook the second side!


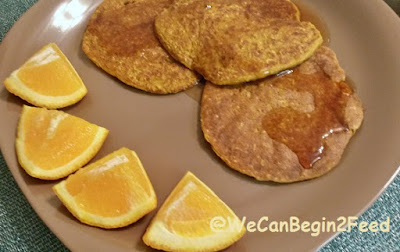
Spicy Pumpkin Protein Pancakes
Plated and topped with sugar free syrup. Mmmm!


Do you save your pumpkin for Fall recipes, or are you like me and enjoy it year-round?

What is your favorite vanilla protein powder?


Monday, December 21, 2015

5 of My Most Popular Recipes in 2015

Looking back over the year, I realized I have posted many fewer recipes than in previous years. I have to admit to doing less experimenting in my own kitchen than I have in the past, and have been enjoying favorites that are already created, way more often.

Here are 5 of the most popular recipes I posted this year. Not only were they viewed, and Pinned quite often, they are dishes that I like to make over and over again myself... so I am going to highlight them here for you, so that you can check them out for yourself if you missed them the first time around.

They are all gluten freen,  and grain free. They may contain eggs or egg whites.  Where I call for a particular brand, use your own favorite version.  I hope you will enjoy them as much as I do myself!

In no particular order...


Low Carb Revolution Rolls


High Protein Waffles


Ultimate English Muffin


High Fibre Egg White Muffins


PB2 and Banana Waffles


What was your favorite new dish this year?  

Do you experiment in your kitchen or do you stick with the tried and true?


Wednesday, November 04, 2015

Favorite Fall Soups... My Current Top 5

It's soup weather at my house!  The best thing about the changing temperatures... getting cooler... is that I start to really enjoy those foods that I tend to think of as Fall Favorites.  You know what I mean... soups, stews, chilis... and it's time to get the slow cooker out of storage, too.

I have so many Fall soups in my lineup and I find it quite difficult to pick out just a few to call favorites, but these all have something a bit unique about them and are different fromo some others that you may find on Pinterest or by Googling so I want to highlight them here and share them with you.


5 Favorite Fall Soups @WeCanBegin2Feed


Some are vegetarian, some are not, but all of them are gluten free and of course, delicious!  If you want, replace the chicken/turkey stock in any of these recipes with a veggie broth, or even plain water. The spices will take care of the flavor!

Here is the lineup.... in no particular order... with links to the original blog posts where you will find the story behind the soup, and of course, the recipe!  I hope you enjoy them as much as we do at our house.  Just click on the picture to find the link.


Roasted Red Pepper Soup
(with instructions as to how to roast red peppers in your oven)

Roasted Red Pepper Soup


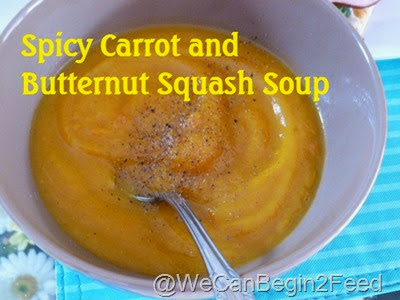
Spicy Carrot and Butternut Squash Soup


Spicy Carrot and Butternut Squash Soup


Better Than Noodle Chicken Soup

Better Thank Noodle Chicken Soup


Cauliflower and Roasted Red Pepper Soup

Cauliflower and Roasted Red Pepper Soup


Curried Coconut Sweet Potato Soup

Curried Coconut Sweet Potato Soup

What is your favorite Fall soup ingredient?


Thursday, October 22, 2015

The Ultimate English Muffin, Gluten Free and Grain Free

This recipe for my Ultimate English Muffin is one that I have been fine tuning and tweaking for the past several weeks.  I am finally satisfied that I have it right and am ready to share it. Actually, I am very excited to share it because I think it fills a real need for many of us.  It certainly has for me.

I have been living gluten free (or as much as possible) for a couple of years now, and mostly grain free, too. I have tried a few of the gluten free breads and rolls on the market and even though I have found a couple that are acceptable in taste and texture, I just don't think that all those substitute 'flours' are good for me on any kind of a regular basis.  I really don't want to eat all those carbs either. And let's not even discuss how expensive they are!

But let's be honest.  Occasionally I like to have a sandwich.  Even though my Low Carb Flatbread and Low Carb Tortillas are great, I don't always have some on hand... or thawed, as I do store them in the freezer.  I needed to come up with something new made from ingredients I normally have in the cupboard and fridge, and that make up quickly and without a lot of fuss.

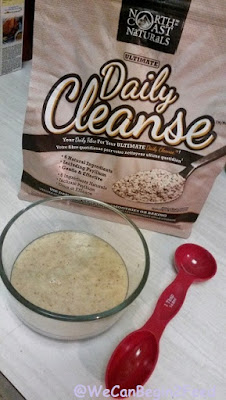
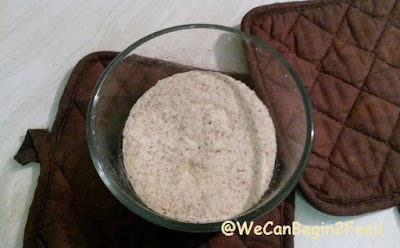
These little faux English Muffins fill the bill.  I have decided to call them Ultimate English Muffins because I am using a bit of North Coast Naturals Ultimate Daily Cleanse to give them a bit of body... NCN sent me this product several months ago to sample and test, and I have been using it a lot ever since.  You can use either ground flax seed or psyllium husk (or a bit of both).  I have tested the recipe with both and it is just fine.

However, here is a bit of a warning.  Don't leave out the olive oil. They don't work. And don't use coconut oil either. I tried it. Fail.  For some reason coconut oil doesn't mix well with the hot water and cold egg whites.

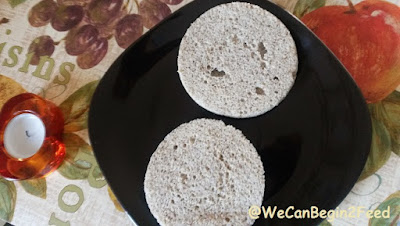
I am really pleased with the texture of these little muffins.  I have eaten them untoasted and also toasted, and I prefer the latter.  They could be dressed up with the addition of cinnamon or savory herbs, I am sure.

I use a glass container to cook them in the mike. It is about 3-1/2 inches in diameter. I think you could use something a bit smaller if you like... but anything bigger will make them too thin to slice easily.

I would love to know what you think if you give them a try... and I hope you will if you are looking for a gluten free, grain free English Muffin.


Ultimate English Muffin by @WeCanBegin2Feed


Ultimate English Muffin
Makes 1 muffin
  • 1/4 cup egg whites
  • 1 Tbs hot water
  • 1 tsp olive oil
  • 1 Tbs coconut flour
  • 1 tsp North Coast Naturals Ultimate Daily Cleanse (or flax seed or psyllium husk)
  • 1/2 tsp baking powder
  1. Beat the egg whites, water, and olive oil in a medium bowl.
  2. Add the coconut flour, Ultimate Daily Cleanse, and baking powder.
  3. Beat again. The coconut flour will thicken as it absorbs the moisture.
  4. Pour batter into microwave safe dish.
  5. Cook in the mike for 2 minutes.
  6. Remove the muffin from the dish with a spatula and turn out onto a cooling rack for several minutes.
  7. Slice in half and toast if desired.
Per serving.
Weight Watchers P+ = 3.

Calories 109
Fat 6.1g
Sat. Fat 1.7g
Carbohydrates 6.1g
Sugar .5g
Fibre 3.4g
Protein 7.3g

Did you notice a change in the way I have reported the Nutritional Information for this recipe?

Starting with this recipe, I am offering more N.I. details than I previously have. I have been reading more and more lately about how important it is for us to reduce sugar and saturated fats in our diet (Zero Belly Diet by David Zinczenko) so I am going to report those statistics for my recipes.  I use either Fit Day or My Fitness Pal to do my calculations so they are as accurate as I can make them, based on the ingredients I quote.

UPDATE

Weight Watchers released their new SmartPoints food program on December 6th, 2015. It also concentrates on saturated fat and sugar, so I wanted to share the SmartPoints values for this recipe as well.


Per serving.
Weight Watchers SmartPoints = 3.

Calories 109
Fat 6.1g
Sat. Fat 1.7g
Carbohydrates 6.1g
Sugar .5g
Fibre 3.4g
Protein 7.3g


Ultimate English Muffin
Before popping into the mike.

Ultimate English Muffin
And after cooking.

Ultimate English Muffin
Cook on rack for a few minutes before slicing.

Ultimate English Muffin
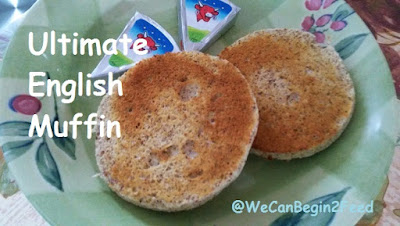
After slicing....

Ultimate English Muffin
and toasting.

Ultimate English Muffin
These are toasted a bit more.

Ultimate English Muffin
With a bite gone so you can see the inner texture.

Ultimate English Muffin
And the ultimate breakfast sandwich!

Printable Recipe

What do you think? Is this something you might like to try?