Showing posts with label cinnamon. Show all posts

Friday, September 20, 2013

Roasted Squash and Protein Sludge Bowl

I love squashes of all kinds and I am happy that we can purchase them all year long… but in my little corner of the world, we can buy locally grown in the Fall.

And they taste so much better! Kabochas (you may call them Buttercup), Acorns, Delicatas, Butternuts, and Spaghettis... love them ALL.

I like to have some every day and can make a meal of them… but I have learned that I do need to have some protein at every meal, too, not just carbs.  So I have had this tasty little concoction for dinner a few times lately and thought I would share it with you.

It is basically just some cut up squash, spritzed with EVOO and sprinkled with cinnamon, roasted in the oven and then topped with nut butter, hemp seeds, and a protein powder sludge.  Delicious.  Filling.  Good for you!  What could be better?

And my handy dandy little oil sprayer is the perfect tool for this job.

I have done it with kabocha squash, and with butternut squash, and later today I will be having some with acorn squash.  Think I may try it with chocolate protein powder, too.

Sept 2 Kabocha bowl 001

Roasted Squash and Protein Sludge Bowl
Makes 1 serving
  • Squash of your choice, enough for 1 meal size serving… this could be 1/2 acorn squash, 1/2 butternut squash or about 1/4 of a kabocha squash, about 2 cups
  • 1 tsp olive oil
  • sprinkle of cinnamon
  • 1 scoop vanilla protein powder
  • 2 Tbs almond milk
  • 1 Tbs almond butter
  • 1 Tbs hemp seeds
  1. Preheat your oven to 375° F.
  2. Wash the squash and then cut it into large chunks. You can remove the peel at this point if you will not eat it.
  3. Place squash pieces on roasting pan, cut side up. Spray them with olive oil and sprinkle liberally with cinnamon.
  4. Bake for 45 minutes or until soft.
  5. Meanwhile mix protein powder and milk in a small bowl or measure cup to make a sludge.
  6. Place the cooked squash pieces in a serving bowl. Drizzle the protein powder mixture over the top.  Spoon the almond butter over the top. Sprinkle the hemp seeds over everything.
  7. Serve warm.

Per serving.
Weight Watchers P+ = 10.
Calories 388; Protein 32g; Carbohydrate 39g; Fat 14g; Fibre 9g.

The N.I. will depend on the ingredients you select, of course, but this is my calculation for the kabocha squash and vanilla whey protein as illustrated.

You could certainly  make a smaller version for lunch, or use less nut butter if you like.  I hope you will get creative with your own bowl!

Sept 2 Roasted Kabocha 001
I like to roast a whole kabocha at a time; then I will have some already cooked for egg scrambles, and salads, and snacks.


Sept 16 sqiash dinner 002
This one was done with peeled butternut squash.

Are you a squash fan?  What is your favorite kind?

Wednesday, November 28, 2012

Love This Sweet Squash Scramble

The other day I came across this idea at Carrots 'n' Cake.  And I have to admit, I was pretty skeptical about it... but I did have some ambercup squash left over from dinner the night before, and decided to give it a try... but not for breakfast... for lunch.

It was delicious!  And you really have got to try it.

I think it would be really good with sweet potatoes or any other kind of orange squash too... I am going to cook some butternut squash, just to have leftovers to make this again.

Tina calls it Sweet Breakfast Scramble... but honestly, you could enjoy it any time of the day, not just at breakfast.  I had it for lunch and would make it for a recovery snack after a hard workout or long run, too.

With some almond butter on top...
 

and a bit of vanilla yogurt too.
 
 
The real trick to it, I think, is to make sure you are patient enough while cooking it, to keep stirring the mixture in the pan and get the egg cooked all the way through... it does change color a bit and the texture changes, too, as it cooks so there is a visual clue.
 
In the skillet, not yet cooked.
 
 
Any nut butter would be a great topping along with some cinnamon...


and your favorite yogurt, too, if you like.
 
The possibilities for variations are really endless... you might try pumpkin with all the appropriate spices such as ginger, cinnamon, nutmet and cloves...


and I did try it with banana too.
 
The N.I. as I made this, with ambercup squash, is as follows:
 
Per serving, without toppings.
Weight Watchers P+ = 4.
Calories 149; Protein 14g; Carbohydrate 12g; Fat 5g; Fibre 2g.
 
You can easily afford a few more P+ for adds ons!
 
Check out the original post on Carrots 'n' Cake for the recipe and instructions... and leave Tina a comment telling her I sent you! 
 
Have you tried anything like this?


Wednesday, January 18, 2012

My Favorite Oat Scones... I Hope You Love Them Too!

I am so excited to share this recipe with you today!  It was probably 4 or 5 years ago that I first found it on the bootcamp buddies forum on healthdiscovery.net. I usually make it during the Winter months when we have been housesitting and have a freezer to use.  We both really like it.

I made only a slight change from the recipe as I found it and posted it last Spring, leaving out some salt and artificial sweetener as I don't think they are required.

These scones are very versatile and quite portable, too.  You can eat them as is, or put some peanut butter or perhaps honey or jam on them... you can break them up in yogurt and top with fruit, or even top them with a slather of Laughing Cow cheese or a slice of cheddar.  Eat them cold or reheat them in the mike... it is up to you.  If you wrap them in plastic you can easily take them along with you for a snack or for lunch.

The cinnamon and pumpkin pie spices make the kitchen smell wonderful as the scones are baking and cooling.  Mmmmmm.

The recipe freezes very well so I often package them in two's and then pop them into the freezer... they only take an hour or so to thaw on the countertop, or a few seconds in the mike.

Oat Scones by @WeCanBegin2Feed

Oat Scones
Makes 8 servings
  • 1 cup fat free milk
  • 1-1/2 cups rolled oats
  • 1/2 cup fat free plain yogurt
  • 1 egg
  • 1/2 cup unsweetened applesauce
  • 2 tsp baking soda
  • 1 tsp baking powder
  • 1 tsp cinnamon
  • 1 tsp pumpkin pie spice (or other spices to taste the same.. allspice, cloves, nutmeg)
  • 1 cup oat bran 
  1. Preheat oven to 350°F.
  2. Heat fat free milk till scalded - about 2 minutes in the microwave oven.
  3. Add milk to regular oats in large mixing bowl, and let sit for a few minutes to soften oats.
  4. Spray large pie plate with non-stick spray.
  5. Add fat free plain yogurt to oats, along with the egg and unsweetened applesauce, and mix well.
  6. In another bowl mix the baking soda, baking powder, cinnamon, pumpkin pie spice and oat bran.
  7. Stir the 2 mixtures together and pour into prepared pie plate and put into preheated oven.
  8. Bake approximately 30 minutes, or until golden on top.
  9. After removing from oven, let sit for about 15 minutes and then cut into 8 wedges.
Per serving of 1 wedge.
Weight Watchers P+ = 3.
Calories 122; Protein 6g; Carbohydrate 22g; Fat 3g; Fibre 4g.

UPATE 2017 for Smart Points calculation.
Per serving of 1 wedge or 1/8th recipe
Weight Watchers SP = 4.
Calories 122
Saturated Fat .5g
Sugar 3g
Protein 6g


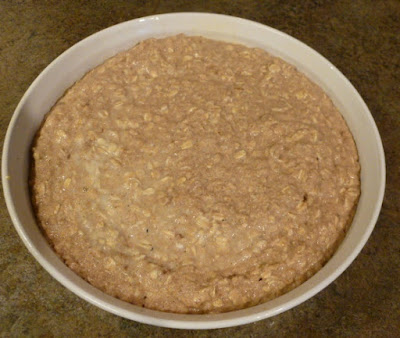
Oat Scones
Add oats to scalded milk and let sit so the oats can soften.


Oat Scones
Add the yogurt, egg, and applesauce.


Oat Scones
Stir to mix well.


Oat Scones
Stir in the other already-combined dry ingredients.


Oat Scones
Pour the batter ino a prepared pie plate.


Oat Scones
After baking for 30 minutes, let sit to cool somewhat before cutting.


Oat Scones
The wedges are easily removed from the baking pan.


Oat Scones
And are generous in size.
.

Oat Scones
With a wedge of Laughing Cow cheese....


Oat Scones
and jam

Friday, January 13, 2012

A Cookie to Thank to The Captain

The Captain and I started training for our first half marthon last week. He is not really interested in running but accompanies me to support me and my efforts to take part in this upcoming May race. It is often annoying to me that he runs with so much grace and ease while I struggle, but I am so appreciative of his support that I wanted to reward him.  So I baked some cookies for him. 

He always loves cookies with raisins and this recipe I found in a book called Ultimate Foods For Ultimate Health looked like it would fill the bill.

The recipe calls for margarine but I used butter instead.  And I also subbed quick oats for rolled oats as I think they bake up better in a cookie or in cakes.  Do give them a try!  They only cost 3 P+ for 2 cookies and are well worth it.

The Captain gave them 2 thumbs up!  They are not overly sweet and go nicely with a cup of coffee or a glass of milk or even some holiday egg nog if you are still lucky enough to have some in your fridge.


Oatmeal Raisin Cookies
Makes 50 cookies, 25 servings of 2 cookies each
  • 1/2 cup butter
  • 1/2 cup dark brown sugar
  • 1/2 cup granulated sugar
  • 1 egg
  • 2 Tbsp water
  • 1/2 tsp vanilla
  • 1-1/4 cups whole wheat flour
  • 1-1/4 cups quick or rolled oats
  • 2 tsp cinnamon
  • 1/2 tsp baking soda
  • 1/2 cup raisins
  1. Preheat oven to 375°F.  Line a cookie sheet with parchment paper.
  2. In a medium bowl, cream the margarine.  Beat in the sugars until fluffy.
  3. Add the egg, water, and vanilla.  Beat until creamy.
  4. Add the whole wheat flour, rolled oats, baking soda, and cinnamon.  Mix until combined.  Stir in the raisins.
  5. Drop by rounded teaspoonful onto the cookie sheet.
  6. Bake for 12 to 14 minutes.  Cool slightly before removing them from the cookie sheet.  Let them cool the rest of the way on a wire rack.

Per serving of 2 cookies.
Weight Watchers P+ = 3.
Calories 108; Protein 2g; Carbohydrate 16g; Fat 4g; Fibre 1g.


Note:
The N.I. given is as I made them, and slightly different from the original recipe in the book because of the ingredient changes.

If the butter is soft it will blend more readily with the sugars.


Beat till creamy and light.


Add the egg, water, and vanilla and beat again.


Blend the dry indgredients into the wet, and then add the raisins.


Drop by spoonfuls onto the pepared baking sheet.


After cooked, let cool slightly on baking sheet before removing to a wire rack to cool completely.


Enjoy with afternoon coffee...


Or with big glass of ice-cold milk.

Wednesday, January 11, 2012

Apples and Butternut Squash Pair in an Easy Casserole

We had left over pork tenderloin for dinner last night and I wanted to dress it up with a lovely and delicious side dish... so I chose this apple and butternut squash casserole.  This is a dish we have enjoyed several times over the past few years.  I cannot recall where the original recipe came from but I know I have reduced the amount of butter and sugar!

It is sweet and savory at the same time, and has a nice soft, creamy texture. It smells soooo good while it is in the oven, cooking.  If you like, toss in a few raisins and add 1 P+ to the total.


Apple and Butternut Squash Casserole
Makes 4 servings
  • 1 large apple, cored and sliced thin
  • 8 oz. butternut squash, peeled and sliced into  1/8th inch slices 
Topping:
  • 1/2 Tbs flour
  • 1/4 cup brown sugar
  • 1/4 tsp salt
  • 1/4 tsp cinnamon
  • Dash of nutmeg
  • 2 Tbs butter 
  1. Preheat your oven to 350°F.
  2. Coat a 9" x 9" pan with non-stick spray.
  3. Layer the apple and butternut squash slices in the pan, 2 layers of each.
  4. In a small bowl mix the flour, sugar, salt, cinnamon and nutmeg together.  Add in the butter and crumble with your fingers.
  5. Sprinkle crumbled mixture over the apple and squash slices.
  6. Bake for 60 minutes.
Per serving.
Weight Watchers P+ = 4.
Calories 134; Protein 1g; Carbohydrate 21g; Fat 6g; Fibre 2g.


Slice butternut squash thinly.

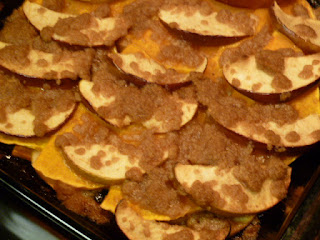
Layer squash and apple in pan.

Mix dry topping ingredients together.

Mix in butter till crumbly.

 
Sprinkle topping over layered squash and apples.

After it bakes for an hour...

 
It can easily removed from pan to serve.

Wednesday, November 30, 2011

Banana Cinnamon Microwave Muffins

Lately I am obsessed with these  Microwave Muffins .  They are such a filling treat for only 2 P+ and there are so many fun and tasty ways to make them.  And,  I have done some experimenting and found they can be made with spelt, whole wheat or even white flours.

Normally I would make them 2 at a time but today I decided to make just one for me, as The Captain was otherwise occupied with a huge, gooey, fattening cinnamon roll...  so I halved the basic ingredients, and then used even less mashed banana. 

Why?  Well, bananas have more calories than pumpkin or applesauce, which are what I have used when making other versions of these muffins.  So, to keep the P+ count to 2, I reduced the amount of mashed banana to 1/8 cup in this individual serving.  It was plenty and quite tasty!


Banana Cinnamon Microwave Muffins
Makes 1 serving
  • 1/8 cup mashed banana
  • 1 Tbs organic spelt flour
  • 1 egg white
  • 1 packet Splenda
  • 1/4 tsp baking powder
  • 1/2 tsp cinnamon 
  1. Spray a small microwave-safe bowl or mug with non-stick spray.
  2. Mix ingredients well and place in bowl.
  3. Cook on HIGH in microwave oven for 2 minutes.
  4. Leave cool about 5 minutes in the dish, then turn out and leave another 5 minutes before serving.
  5. Top with yogurt, fruit, nut butters, etc.
Per serving, without toppings.
Weight Watchers P+ = 2.
Calories 86; Protein 8g; Carbohydrate 13g; Fat 0g; Fibre 2g.


Ingedients mixed and placed in microwave-safe bowl.


After miking, let it rest several minutes to complete cooking.


Put on your favorite toppings and enjoy!


Here are some other versions you may want to try:


Monday, November 21, 2011

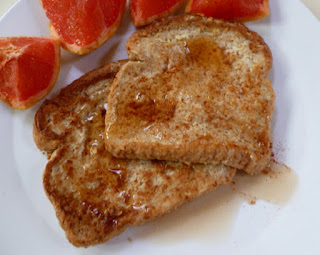
A New Twist on French Toast

I really like French toast and am constantly trying new recipes for it.  Today my mouth was watering for some at breakfast time but I didn't have any milk in the fridge and I didn't feel like rooting around in a food locker for a tetra pak of Almond Breeze.

I did, however, have vanilla yogurt in the fridge so I decided to experiment wiht it, using it in place of the milk that I would normally mix with an egg to make the mixture that I dip slices of bread into to make French toast.  It worked very well and I will be doing more experimenting with other kinds of yogurt in the future, especially fat free because that is what I normally use.


French Toast with a Twist
Makes 2 servings
  • 4 slices whole grain bread of your choosing
  • 1/4 cup vanilla yogurt
  • 1 whole fresh egg
  • dash of cinnamon
  1. Mix together the yogurt, egg, and a dash of cinnamon in a bowl that is wide enough to lay a bread slice into, flat.
  2. Lightly coat a frying pan with non-stick spray and set over MEDIUM-HIGH heat.
  3. Lay a slice of bread on the yogurt/egg mixture and then flip it over and coat the second side.
  4. Place in the pan on the stove and cook a couple of minutes till golden, flip and cook second side.
  5. Remove the cooked bread to a serving plate and cover to keep warm.
  6. Coat and cook the rest of the bread in the same manner. You may need to spray pan again with non-stick spray between slices.   Make sure to do this away from the hot stove.
  7. Place 2 slices of French Toast on each plate and sprinkle them with a bit more cinnamon.
  8. Serve with your favorite syrup or with fruit preserves.

Per serving, not including syrup or preserves.
Weight Watchers P+ = 6.
Calories 240; Protein 10g; Carbohydrate 38g; Fat 5g; Fibre 1g.

Note:
The nutritional information and number of Points Plus will varying depending on the bread and yogurt you select.


Friday, July 15, 2011

Apple of My Eye!

This is a wonderful sweet apple treat that my Sister introduced me to a few weeks ago.


And it is ready in just a couple of minutes.


You can enjoy it whenever the need for something sweet strikes. without any guilt!


Just take any apple of your choosing, wash, core, and slice it into a serving dish.  Add a few dashes of cinnamon, and a spoonful of granular SplendaMix and enjoy!


You can eat it with your fingers (and then lick them!), or use a fork if you prefer.

This makes a perfect afternoon snack, or a light dessert.  Be sure to share it with all your friends...